Dragon’s Head
Character design
This tutorial derived from some feedback given on social media. I was commenting on the approach to create characters.
The dragon’s head is a rather complex shape if you draw/ ink the outline in one go or try and sketch it by hand. This complexity causes problems with the proportions, the placement of details and the shading of the elements later on in the design process.
Using simple shapes, that are easily replaced, moved and rearranged, makes it a lot easier to get to a more consistent looking design.
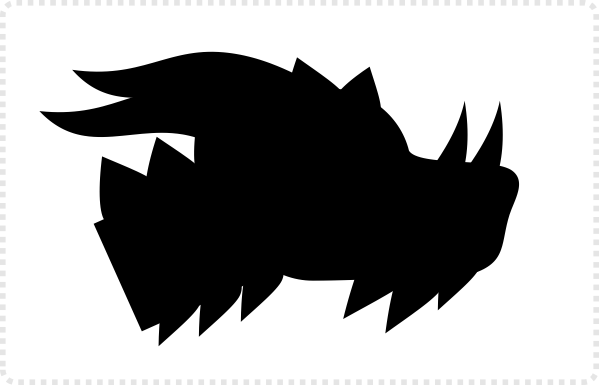
I like to look at the silhouette when designing a new character to make sure the design works. Is the shape clear and recognizable? The silhouette often reveals the elements that do not match or need to be reworked to match the design. E.g. I decided to take off the tusks at the snout after seeing them in the silhouette. Their shape bending to the right didn’t match the rest which is leaning to the left.

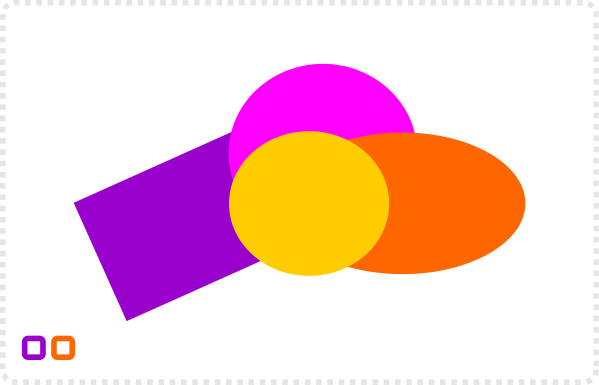
Let’s start with a bunch of circles and a rectangle for the neck. The first stages of the design process are all about finding a silhouette that looks nice and ‚readable‘.
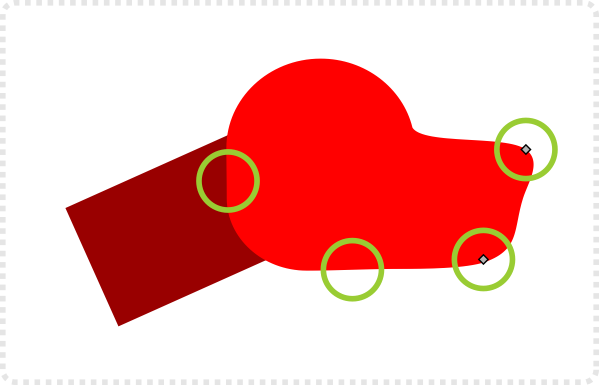
Combine the circles with Path/ Union (CTRL + +) to create the base shape for the head.
Remove some nodes for indents that are not needed and add nodes at the snout to shape it a bit more squarish.
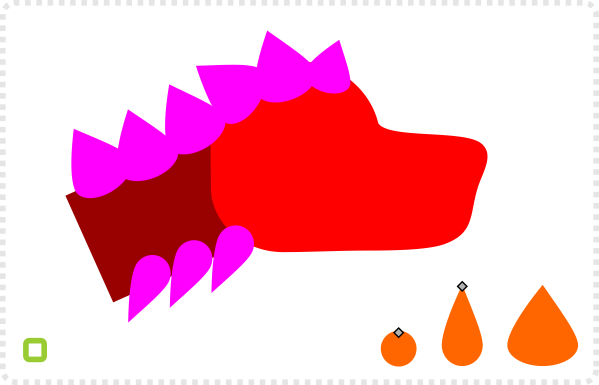
Starting out with a circle, create a drop shape by converting the circle to a path and dragging the top node up.
Turn that node into a corner to make it a sharp point. Scale its width and height for variations.

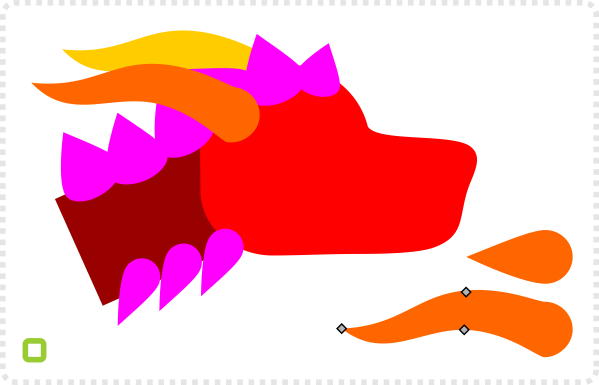
Create another duplicate of the teardrop shape and elongate it. Add two more nodes to allow a curving of the shape for horns/ ears.
Copy and paste is your friend
A helpful shortcut to creating variations of repeating design elements (like the teardrop shape) is to keep them in a separate document. Copy and paste them from there into your current design and just adjust the colours to match.

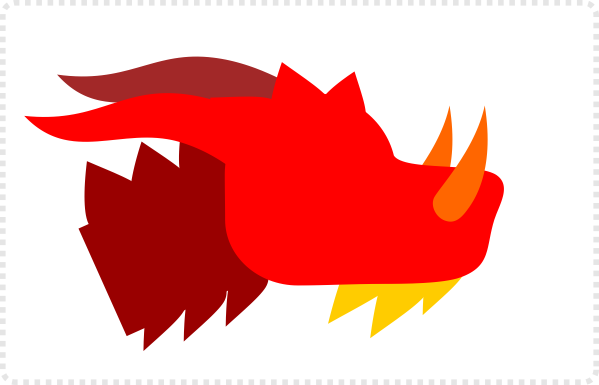
Add more duplicates of the shape for e.g. tusks or beard elements to create more interest and detail.
Note:
Select all elements and colour them black for a quick silhouette view. Easily revert with the undo.
The silhouette view – even in later stages of the design – helps you to determine if the shape works without the details and shading.
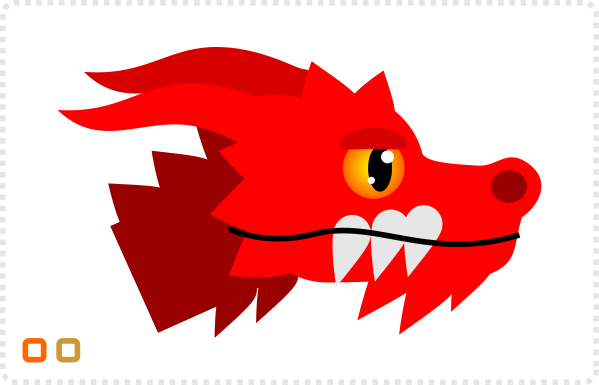
Once you are happy with the base shape, it’s time to bring in more details.
The eye consists of a circle with a radial gradient and 4 more circles for the iris, the highlights and the eyelid.
Add more teardrop shapes for the teeth and a line for the mouth.
With the Path / Union (CTRL + +) combine the teardrops you added to the head with the head shape.
Duplicate the line of the mouth. Select the line, then the head shape and use to Path/Division (CTRL + /) to cut the lower jaw from the head.
Do the same with the teeth to bring them in line with the upper lip.

Inkscape specifics
Note:
“Losing” your original shapes is one thing to keep in mind when using the path altering tools like division, intersection or union in Inkscape. Remember to create a duplicate of the shapes you want to keep or reuse for another path division.

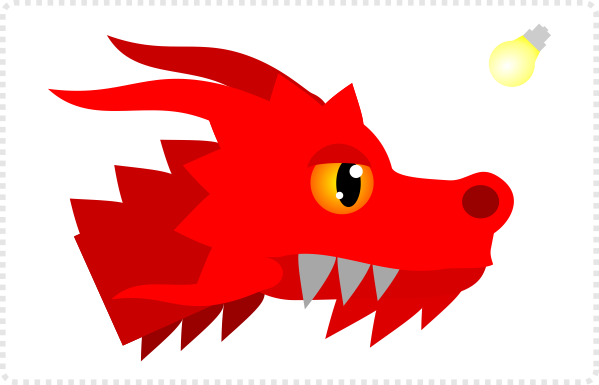
Define your light source.
Note:
It is helpful to add a small marker/ arrow/ icon of a light to your illustration to remind you where the light is positioned.
It’s easy to lose track when duplicating, moving and rotating shapes later that due to the modification wouldn’t match the light setting any longer.
Add shadow to the neck by duplicating the rectangle, colouring it darker and adding more nodes to reflect the shape of the head.
An added circle underneath the eye brings out the glow better and creates the eye socket.
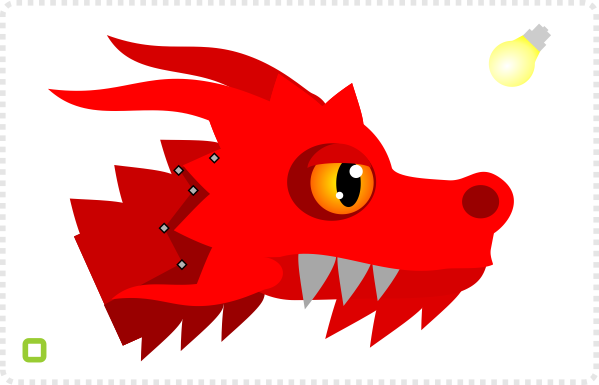
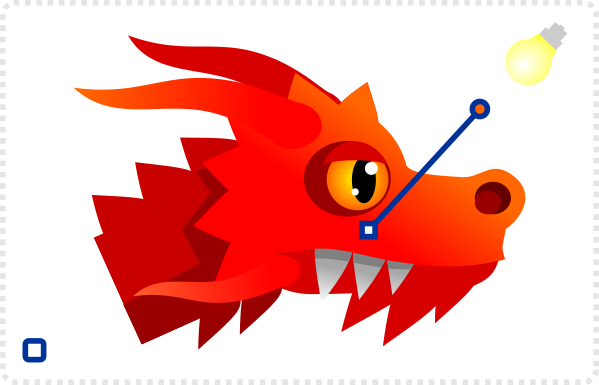
Some of the shading can also be done with gradients.
In this case, the red head gets a gradient to orange as do the horns/ ears or the teeth.
A duplicate of the upper head and a tooth along with the Path / Intersection (CTRL + *) creates the shading on the teeth.
To shade the horns/ ears, create two duplicates of the shape and rotate one slightly.
Align the small ends and create an intersection of the duplicates with Path / Intersection (CTRL + *).
You now get an ‘inner shape’ that you colour with a lighter gradient.
Add a transparent shape created with a Path / Difference for the highlight.
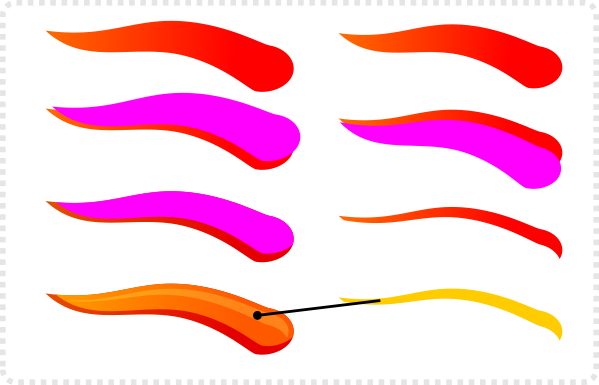
Shading complex shapes
Copies of the base shape are a quick way to create shading elements. Deforming them with intersections and difference gives you the perfect fitting shape easily. For more complex shading you can manipulate the nodes of the copy.

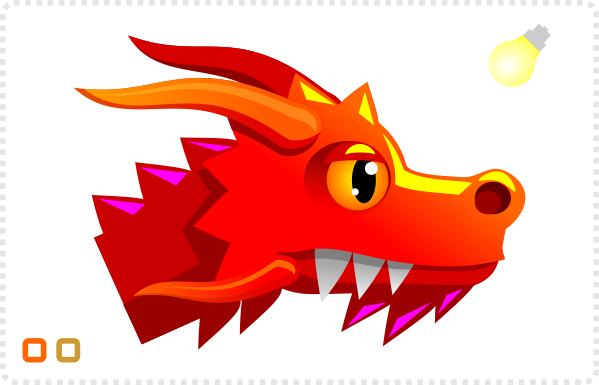
With the light source in mind add some highlights.
Use the pen tool or add some circles deformed to match the shape of the area you want to shade.
Adding an additional light source is a common way to define the shape better.
It would commonly be placed on the opposite side of the main light. You could also use two rim lights (one on each side) and the main light source com

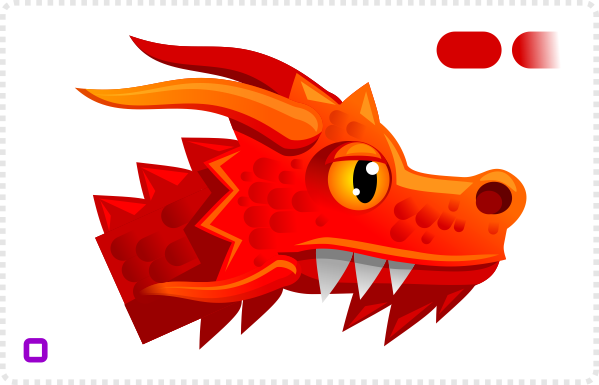
Finally, add some shapes to define the texture of the skin.
Note:
There is really no need to cover the whole shape with scales.
A few scales will usually do.
To get smoother shading you can add a blur effect to some of the shapes via Filters/ Blurs/ Blur…
Note:
I tend to keep a non-blurred copy of the design, saved in a separate file to fall back on in case I need to make changes.
Turn the live preview on to see the amount of blur the effect adds to the shape.
Variations make designs interesting
As with all the tutorials – variation is the key. Play around with the ideas of the tutorial, make the skin green, grey or purple, add more teeth, horns, angrier eyes open the mouth to have the dragon breathe fire. Have fun with your dragon!





Cool… Wäre was für ein neues Game ;)
Ciao
Andre
I appreciate your tutorials. I like how this one can be easily translated to Affinity Designer. Keep up the great work!
Hi Tadd… that's funny as I am working on an affinity designer version at the moment… ;)
Awesome! I gave up on Inkscape when I bought Affinity Designer. Was just more feature rich and caused less overall problems for me.
Looking forward to seeing good, to the point Affinity Designer tutorials!