


Easily find Shading Colours
Inkscape tutorial
This tutorial is about a way to easily find your shading colours. I am not into colour theory – having worked by instinct most of the time – so picking the shading colours to me is not a big decision.

Let’s get started

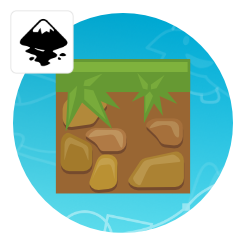
Start with a simple shape in your base colour.
Add two more shapes overlapping the base shape in colours you want to use for shading.
I prefer to avoid plain white and black for the shading.
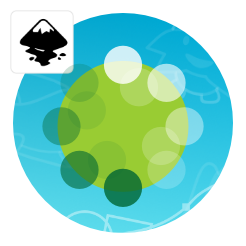
Change the opacity of the shader objects to get a mixed colour.
Duplicate the shader objects and change the level of opacity.
They don’t need to align – it can even be helpful for them to overlap to find the right colour.


Grouping all the light coloured shaders and the dark ones allows you to quickly change colours.
Using the colour picker you can now choose a colour from your ‘shader objects’ with one click.

This is a version using 10% differences and a cleaner layout. Using a couple of these with the base colours of your illustration above your design are will allow quick picking of matching colours.
As usual, my advise is to play around with it. There is no need to go with white as a highlight shader. Try a light yellow or a if the colour theme is “under the water” maybe a light blue will do the trick. A warm green should look good for a dense forest, jungle feel while a shading with red would be an alarm colour. Think neonlight illumating the objects.
I hope this tutorial on finding colour for highlight and shading was helpful! Enjoy!
Here‘s a file with the ‘rectangle version’.


Nice little tut! Thank you!
You are welcome… I hope it makes sense and is not too obvious and simple…
Thank you very much for you nice tut..
Typically, cooler colours (blueish) are used for shadows and warmer colours (yellowish) for highlights. You may not be into colour theory but your instict appears to be spot on :)
Chris, how do you export your sprites? PNG gives me blurred edge
I do export at a larger size and then use gimp to scale it down. E.g. I am creating my character assets in a square box as a canvas area and export it at 512×512 even if I need a 96×96 or smaller output. That way I get better/ cleaner outlines and the scaling algorithm in gimp/ photoshop or other bitmap tools usually is superior to inkscape's.
https://2dgameartforprogrammers.blogspot.com/2012/02/working-with-bitmap-output-in-mind.html
you always make that simple.. thank's :D
because it is…
I have a question: In the third row the lightening/shading colors are suddenly white and green, instead of yellow and blueish as before. Is this intentional, so for the tree you use these shading colors?
Yes… Sorry for changing without a mention. The shader with white and green just felt softer. You would use the yellow and purple for a late sunset fell with strong shadow and warmer highlights – the white and green is more a midday sunshine feel.
The only problem with choosing the color from the shading object with the color picker is that it chooses the exact same color but without transparency (it calculates the color without transpranacy). So if you want to change the main color, all shadows have to be replaced, too!
To avoid that problem you can always work with the shades being transparent objects that are cut to fit by e.g. a clip.
Really nice tutorial
this is very useful, I'm pretty bad with colors!