


Note:
This tutorial is also available as a youtube video.
Having fun with squares
Inkscape Tutorial
The second tutorial is another introduction to basic shapes in Inkscape. This time we are going to have fun with squares. We turn them, scale them, bend them, round them off and rearrange them to create complex shapes.


Start by creating a simple square.
Take the square, duplicate (CTRL+D) and scale it. By using the bottom modifier we keep the new square aligned.
Add another square to the design and round the edges by altering the Rx and Ry values.
Duplicate more squares to add detail. Convert them to paths ( Shift + CTRL + C ) and alter the nodes to deform them.


Add another square without rounded corners and rotate it 45 degrees.
After converting it to a path, use the node tool to elongate the diamond shape.
Duplicate it with varied sizes and rotation.
Add a lighter square at the top to create and deformed copies of the rock to create highlights.
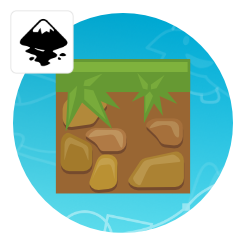
With all the core elements in the design, we can easily create variations to make the platforms look less repetitive.

Variations
The biggest advantage of using vectors is the ability to quickly change the design. With all the elements in place, it’s a breeze to rearrange, recolour and design variations. When creating blocks, tiles or props for a game I try to make a few similar elements. It will look more interesting and less repetitive in the game later on.

A variation of the common tile is the wooden crate. Start with a square again.
After adding two smaller duplicates of the squares, duplicate them again to create boards.
Add some highlights by placing elongated rectangles in a lighter colour.
A little decor added after and we end up with a quick and simple element for a 2D game.


By combining those basic shapes it’s easy to create a simple platformer game. Add more variations to the tiles (e.g. the corner pieces or some simple plants or diamonds to pick up the game will quickly come to life).
Get the source art for this tutorial [.svg/ .pdf] for free!
View Modes
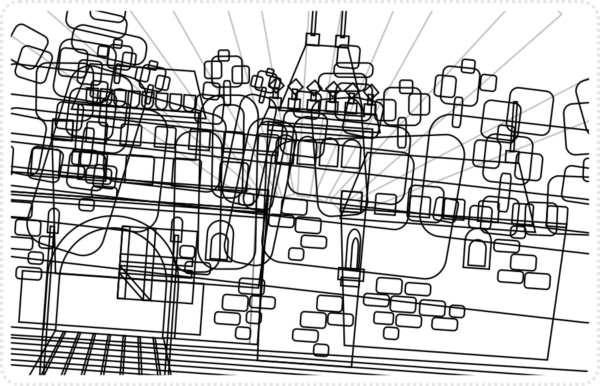
The outline version might look somewhat messy. Nevertheless, it shows that the whole scene is made up of nothing but squares and deformed rectangles.

Let’s have a look at a more complex design using the same principle. This castle scene is based on square shapes rotated, scaled, some with modified nodes or rounded edges.
To illustrate this, let’s strip the colour off from the image and show the shapes as outlines. As you can see even seemingly complex scenes can be reduced to simple geometric shapes.
Get the source art (SVG, PDF, AFFINITY & CDR file) for this tutorial for free!
…and please let me know what you think about the tutorials, tell me what you would like to see featured or would like me to change.


Hey, in the final image of the ground the pieces of rock have some kind of shadows how did you did it?
Thanks! great articles btw keep em coming!
I made a duplicate of the shapes, moved them down just a little and behind the actual rock shape and colour filled them with a slightly darker dirt shade.
As for the highlights, they are also a duplicate, scaled down just a little, filled with a very light yellow and set to ~opacity% alpha. Then I mode the nodes in the bottom right of the shape upwards to create a highlight that's just narrow shape on the top of the rock shape.
Great tutorials! Thank you so much.
I'm struggling w/ the highlights part – a simple step by step to create highlights would be amazing.
Thanks so much and keep them coming.
Hi :), first let me tell you that I love your tutorials, they're really easy to follow, especially for me that I just started in this.
I tried to make the wooden boxes that you teach us here but I'm having trouble making the little silver balls in each corner, no matter what I try they just don't look as good as yours :/.
Could you make a tutorial explaining how to get that silver effect? See you soon and I'll be waiting for more tutorials!
hey your tutorials are amazing i am currently working with these love from Latvia
Hi,
I just wanted to that you for the tutorials. My and art has never been friends until now. Very easy to make pretty good looking things. Thank you!
you my friend are a genius!!
Great! Thank you very much!
Amazing tutorials !! Thanks a bunch !
Hi Chris, Is there a way to determine the lighter color for the highlight? What color format are you using to determine the highlight color?(RGB,HSV or maybe something else). Sorry for the bad english and I,m completely new with this so sorry if this is a stupid question.
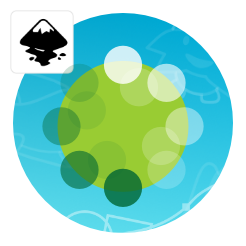
I use RGB most of the time and there is an easy way to create shadow and highlight colours if you are not sure what to pick.
Create a shape in your base colour and then add smaller shapes overlapping this base shape with changing opacity levels.
I had to try this one out and made a quick tutorial about it… :)
I just want to tell you that you are awesome! Love this site!
You are amazing. Please keep it up!
Hi
Just to share that I published 2 new HTML5 games using techniques that I learn from your tutorial. Thank you very much. I still need a lot of practicing though. When will your new tutorial is going to be published ? :)
https://tumira.byethost7.com/MunchieBob/
https://gila2games.com/mobile/timmysgems/
Nice work… I am glad my ramblings help… and I apologize for the delay… I have been sidelined with health issues last year and have been flooded with work since… but I will write the next tutorial soon.
Hey, Ahmad! I really enjoyed MunchieBob! But the controls for timmysgems was a little troublesome. The up and down didn't seem easily controlled. Still really cute and fun. It's more than I can do right now, but I am learning! Good luck and keep up the good work!
Hi!
Your tutorials are really great! I've just got one big question: I'm completely new to Inkscape. And my colors look aweful! Yours look much more cartoon-like. How do you do this?
So grateful for this, thank you
one of my Favs . I enjoy going back to your initial posts!
I’m wondering how to turn the square 45 degrees? other than turning the thing with my mouse is their a better more accurate way? thanks when someone replies
Your tutorials look good and are useful. I will implement them for my games. Thanks something like this is needed
how many times? two times duplicate? for highlight and for shadow?
Yes. I created two duplicates, one for the shadows (placed below the rock shapes and offset a little to be bottom) and another version that I tinted a little lighter and deformed by moving the bottom nodes upwards to create a highlight on the top edge of the rock shapes.
Loving these tutorials man!
such english, much wow
try holding control, it kinda snaps it to certain degrees. Not sure if there is a way to manually enter the degree amount though. Beginner here as well
Great tutorials!!! Thank you very much.