


Creating an eyeball with vectors in Pixar style
Inkscape Tutorial
I am back with a quick tutorial on creating an eyeball with Inkscape in a Pixar style.
Note:
It’s been a while since I posted the last tutorial and as usual, the reasons are plenty. My ongoing struggle with my health is a major reason. I have been feeling the progressive nature of my neural disease lately and it’s affecting my hands more than ever before. As an artist, having my hands feel like they are not his own is far from ideal. Brush, pen, pencil, marker, or mouse all seem to aggravate the pains and aches… but there is too much fun in doing what I am doing to let those stop me.
This is the first ‘basic’ tutorial to get back into the routine. I am trying a new, hopefully, faster and easier approach. Let’s see how it goes.
Inkscape 1.0.1
I haven’t had a chance to ‘play with’/ work in Inkscape since the long-awaited step up to version 1.0. I had a first go with some emoji designs for an Inkscape challenge on social media. Even my attempts to ‘push the limits’ still kept the software running okay and stable. I had a crazy amount of gradients, transparencies, and blurs in it and all I got is a slowing down. The problems with the complexity mainly showed during zooming and the final export to PNG.
In short, I am impressed with the way the tool has progressed.
Let’s get started
One of the elements people commented on with the emoji designs were their eyes. I chose a ‘simple’ eyeball in a style similar to Pixar movie characters. In this tutorial, I will break the creation down into easy to follow steps.


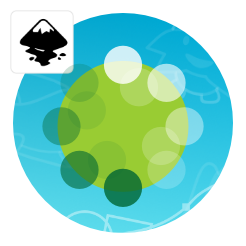
Like most of my tutorials, we start with a circle.
Duplicating (CTRL+D) and scaling it a few times while changing the colours. The outer circle is the darker rim of the retina, followed by a lighter shade, the iris and a highlight.
Once the base shapes are in place, add a bit of blur to smoothen the look. Select the lighter coloured circle and slide the blur [either in the colour panel or the objects panel] until you get a smooth gradient between the darker base and the lighter shape on top.
Highlight
Add a boomerang shape as a highlight at the bottom and a duplicate of the iris – with a darker colour [a purplish shade of dark blue]. Using ‘Overlay’ for the light and ‘Muliply’ for the dark shape as the blend modes in the Fill panel allows for more vibrant shading.


Next up, add a star shape for the pattern on the retina. Move the node towards the centre to make the star more pointy. For this design, I went with 32 points. A smaller version will need less to remain visible and not turn into a visual mess. A duplicate of the star in white and a slightly altered rotation adds details.
Adding a little bit of blur gives those shapes the softness we are after for this design.
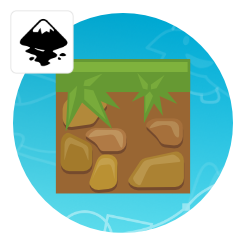
For the eyeball, start with another circle, a smaller duplicate, and another boomerang shape as a highlight at the base. Adjust the blur for those two elements to soften them.


Note:
Before combining the eyeball and the iris elements, I would suggest grouping those and placing them inside a clip [a duplicate of the dark base circle]. That way all excess due to the blur is ‘contained’ within the circle and won’t show on the white of the eyeball shape.
You can easily add more detail – e.g. small additions to the highlight at the base or in the iris, a darker shade at the top of the eye to show that the retina is curved inwards – or alter the colours.


Hey, thanks for all the tutorials. I was happy to see what I managed to create with Inkscape as a programmer!
I don’t know which illness you have, but wanted to suggest looking at fasting if you haven’t already. It’s very powerful to heal certain pains and diseases.
Thanks… and yes… Fasting is a good approach… but it’s just covering some of the side effects of my progressive neurolgical disease [Charcot Marie Tooth].
Rad