Pattern creation in Inkscape
Inkscape tutorial – part 1
I recently wrote a tutorial on vector brushes in Affinity Designer and wanted to translate it to Inkscape. It’s a great way to bend patterns and create interesting designs that would take a long time to do manually. My idea of simply translating the vector brushes to patterns in Inkscape was overly optimistic. Even though the approach is similar there are major differences in the workflow. While Affinity Designer uses bitmap images [PNG files] and aligns them along a path, Inkscape uses a vector curve.
Inkscape requires the pattern to be one curve. It will not work with a group or a combination of curves. This made my initial scale and roof tile designs impossible… but the approach has a major advantage. Once you have placed the pattern you can convert the lot into vector shapes again and adjust, scale and edit to your heart’s delight.
Main tools


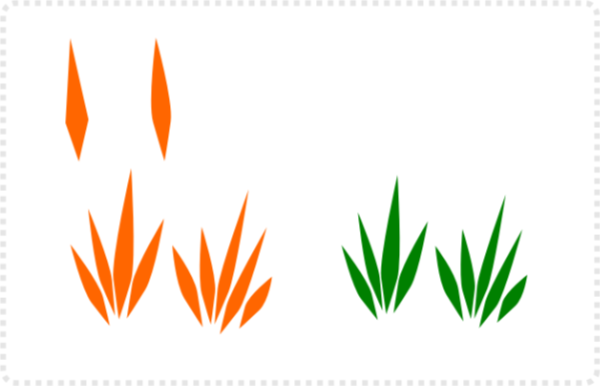
Let’s start
Create some basic grass shapes using the pen tool. Smooth the side nodes with the node tool and duplicate and scale the shape.
Combine the individual curves in one with the Path/ Union [CTRL + + ].
Draw a line with the pen tool. Two nodes are enough for the test. Curve it with the node tool.
Note:
A pattern in Inkscape uses just one curve and can’t consist of a gradient or transparent gradient.
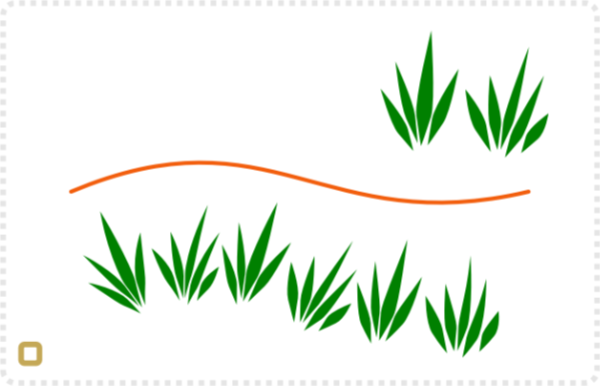
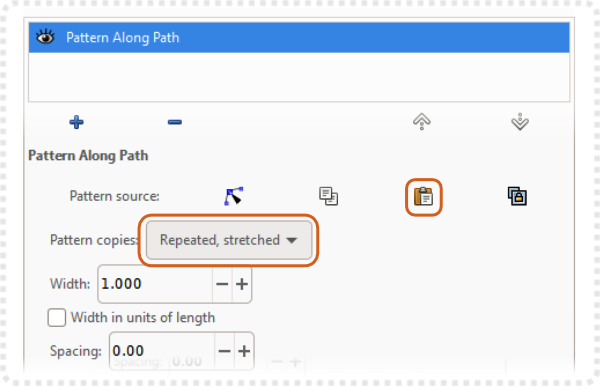
Select the grass and copy it [CTRL + C]. Select the line, go to Pat Effects, and add a new effect.
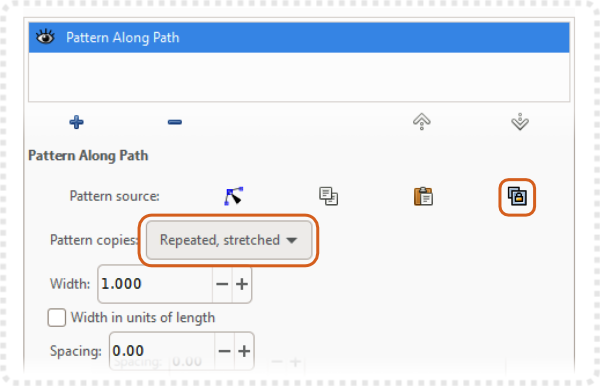
Choose ‘Pattern along path’ and click the ‘Paste Path’ to assign the grass. Set the pattern to ‘Repeat’ or ‘Repeat, stretched’.
The line should now have the grass pattern on it and curve the design to match.
This is a fully editable vector object. You can change the colour, scale, and duplicate it.
Using the node tool allows you to edit the curve and the pattern will adjust accordingly.
Changing the design is easy. Just copy another curve and paste it into the ‘pattern along path’ for quick variations.
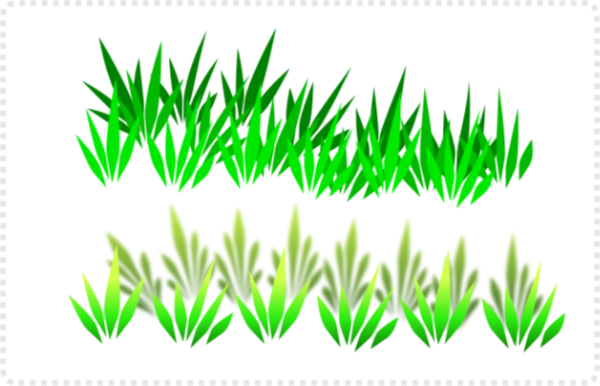
Adding blur and gradient works just as well.
Keeping it editable
If you select the ‘link to path in clipboard’ you get the same effect, the path you designed will be stretched/ repeated along the line, but you can make changes to the original shape and it will update the pattern.

Seamless Pattern
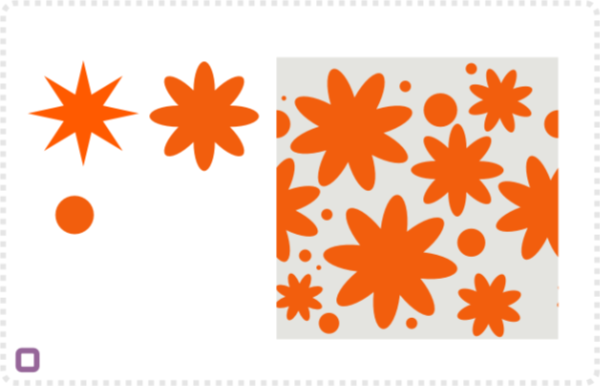
Let’s add some flowers. This time we want the pattern to match seamlessly on the sides.
Note:
I like to work in a clipping mask e.g. a square with a set dimension that I match with the Behavior/ Steps [movement of the cursor keys]. That way you can duplicate an element on the left side if it overlaps and move it to the right.
In order to make the pattern just one curve, combine all floral elements with Path/ Union [ CTRL + + ] and unclip the shape.
Select both the square and the flower shape.
Using the Path/ Intersect [CTRL + *] you can then trim it to the size of the square.

Seamless patterns in Inkscape
I recorded a tutorial about seamless patterns a while back – “Quickly create seamless patterns“. I would use the same approach for a pattern that needs to tile just horizontally. There is no need for a seamless vertical tiling as the pattern will just be repeated along a line.
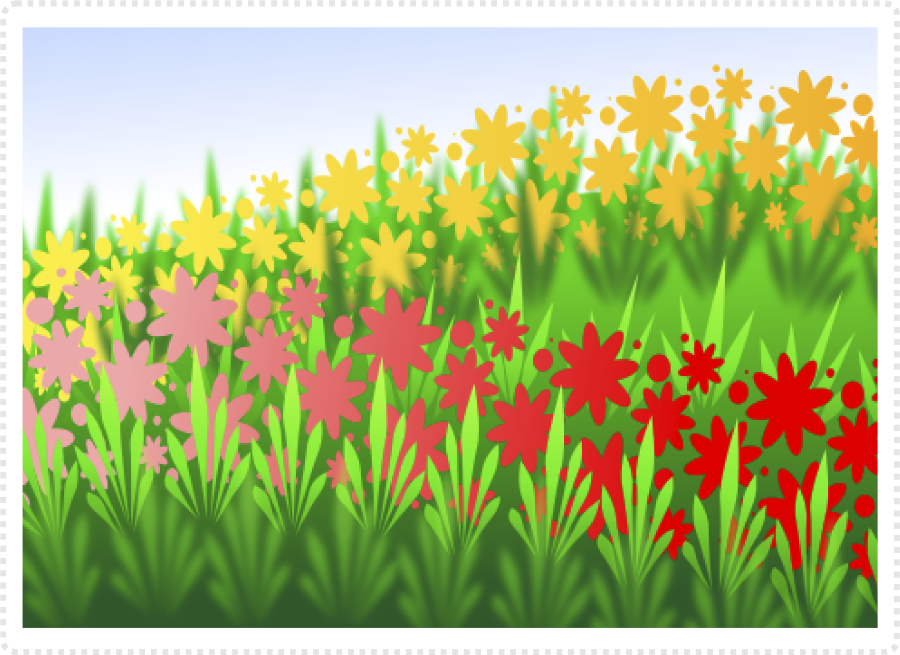
Play around with the colour of the stroke, give it a colour fill gradient, layering and transparency. One of the huge advantages of Inkscapes approach to stick to vector patterns [rather than bitmap brushes] is the ability to convert the ‘pattern along path’ to curves again. Use it to adjust the design or add more variation.
It’s a fun way to create interesting designs.
I hope you enjoyed the first part of the pattern creation tutorials in Inkscape. In the next part, I will design a more complex pattern and show its use in a sample illustration. I hope this tutorial was helpful. Your feedback, comments, and requests are much appreciated.
As usual, enjoy the tool, have fun, and create awesome art!










After you turned me on to Affinity, i see graphics design programs no longer as a choice or some fan thing you support, but merely a tool.
They all have their strength and weaknesses – sometimes AD can do things that Inkscape cant, and vice versa.
In this case, this particular style is more suitable to AD.
Whats nice about ‘Pattern along Path’ is that you can also use the Link option on the right side of the LPE dialogue, insted of Paste, and live edit the pattern, while its applied to the path..
I totally forgot about the link option… and will add it to the tutorial. Thanks!