


Continuing with squares
Affinity Tutorial
This tutorial is a continuation of one of the very first tutorials I wrote. I did an image of a castle scene made up entirely of rectangles and squares. It was a test to see how far I could take it with just one tool in a short time.
I never turned it into a tutorial though, explaining how I got to the result. I decided to make it into a step-by-step tutorial when I began reworking some tutorial for Affinity Designer. In the end, I did get carried away and got this illustration.

Getting started
Most of the tutorials in the past have been created with Inkscape in mind. For this one, I used Affinity Designer – a relatively new tool with a lot of handy features and a reasonable price tag. Most of the steps can be created in Inkscape (I might write an Inkscape version of the tutorial if time permits it). The shortcuts and tool names will differ but the functionality is the same.


Start with a rectangle for the background.
Note:
When creating game assets you normally have a set canvas size in your game (e.g. 2560x1440px). It’s helpful to set up those dimension in Affinity designer [File/ Dokument Setup] with a 72dpi output for easier export.
Using the Fill tool [G] you can set up the gradient fill you the sky element.


To create the starburst effect in the background, start with another rectangle, colour it in the lighter colour of your sky and convert it to nodes via [Convert to Curves] in the top menu.
Move the bottom nodes inwards and reduce the Opacity (at the bottom in the Colour dock)
Rotate the object with the Move tool [V].
The Transform dock has a 3×3 grid for the objects pivot points – the centre of the rotation. Set it to the lower centre. Duplicate the shape [CTRL+J] and rotate it by eg. 15°.
Note:
If you press [CTRL+J] again it will apply the same rotation to the next object.

Alignment
In my opinion, one of the most underrated tools out there. It is such a tremendous time saver. I set up the alignment to work on “last selected” which keeps the last object in its place without moving the lot around on the screen. I wrote a tutorial a while back about working with alignments (in Inkscape). It works just the same in Affinity Designer.

For the distant background create a rounded rectangle to use as the base object.
Duplicate it, rotate, scale and move the nodes a bit for variation.
Note:
I added an outline to the shapes to show the setup.


Create a square and round the corners. It will be the base of our tree shape.
Duplicate and scale it to form the trunk and create some smaller squares.
Arrange them in different ways (adding some more shapes if needed) to create variations.
Adding the Trees and another darker layer made up from the same elements on top finishes off the background.
Note:
To make your illustrations more manageable try and put elements in different layers or groups to allow easier selection and altering later on.

Grouping
Why is it so important to group elements? Can’t I just create things and put them on top of each other? You can. It will just make things harder when you want to change things later. Selection is one of the issues when there are a lot of elements overlaying or close to each other. Group shapes logically. E.g. make a group of the elements of a tree or put the background parts in a different layer from the fore- and midground. If you want to edit later you can just lock layers you don’t want to change.

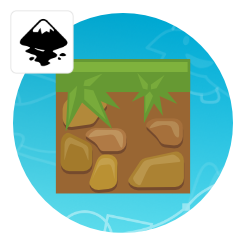
For the mid ground start with another rectangle to define the ground.
Adding a few elements from the background ties it in nicely – more rounded squares in a different colour along with some tree shapes.
Note:
The easy recycling of elements is a big advantage when working with vectors. Build it once and create variations from it rather than create from scratch.


Building the wall requires another rounded square and a rectangle.
Bringing in the bottom nodes of the wall gives it a bit more of a cartoony feel and looks a little less boring.
Note:
Using the Alignment tool in the top menu makes it easy to place the blocks on top of the wall – using the [Space Horizontally].

More grouping

The right colour and a few added rectangles as stones – in slightly different colours – finish off the first castle element.
Another three rectangles are the starting point for the roofed building behind the wall.
Convert the roof shape to curves and bring in the top nodes.
For the roof shingles, set the corner to 100% curve to form a pill shape.


Add a gradient to the roof shingle and set the top colour the same as the bottom but choose 0% opacity in the colour tab.
Duplicate the wall rectangle and scale it vertically – pulling up the bottom controller to keep it aligned.
Colour it a tad darker as a shadow cast by the roof.
Bringing the elements together we can start building our castle.
Take the pill shape and delete the bottom node, convert the two nodes at the base to sharp to create the arched window.

Working modular
I found it extremely helpful to create modular elements. These items will be used frequently in an illustration or a series of illustrations. Rather than start from scratch each time, using already created art will speed things up tremendously. I would even go as far as creating a separate document that will just contain those bits and piece for quick copy and pasting.
In this case roof tiles, windows and the brick pattern could be created once and reused again and again.

For the tower, you can reuse the roofed building, the arched window and the deco stone elements from the walls.
The rooftop is made up of four different elements.
Note:
Repeating elements like those on the roof can easily create nice ornate decoration with minimal work.

Add a gradient to the roof shingle and set the top colour the same as the bottom but choose 0% opacity in the colour tab.
Duplicate the wall rectangle and scale it vertically – pulling up the bottom controller to keep it aligned.
Colour it a tad darker as a shadow cast by the roof.
Puttin it all together allows you to easily create, alter and variate your castle.
Simply add more elements (like the gate or an even bigger tower, more arches and deco elements or altogether darker stone) to make unique buildings.

Conclusion
Creating complex designs can often be broken down to simple shapes. Rather than getting stuck in details, build easy to create elements. Reused parts and rearrange them. Variations are the spice of your illustration. Once you got the base shapes in place, rework and add to them to create new elements.
With just the rectangle tool, rounded edges, some deformations and bit of tweaking you can create highly detailed scenes fast.
Note:
For the illustration at the top of the post, I added (Recolor Adjustment) on various parts to add the blue/ purple tone to them. It’s a nice and flexible option for a quick change in the atmosphere of your image.


Love this blog
Thanks… It means a lot to me to get your feedback to keep me motivated to write more (or at the moment push on with the restructuring of the blog).