General Vector Design
Creating simplified portraits using basic shapes
In this step-by-step tutorial, I will show you an easy and quick approach to creating simplified portraits by building them with basic shapes. Not surprisingly, it’s been a while [again] since I posted and the main reason stayed the same [ongoing health issues]… but I did still play around with vectors and had some fun with a few questions coming up in groups on social media. This is one of them.
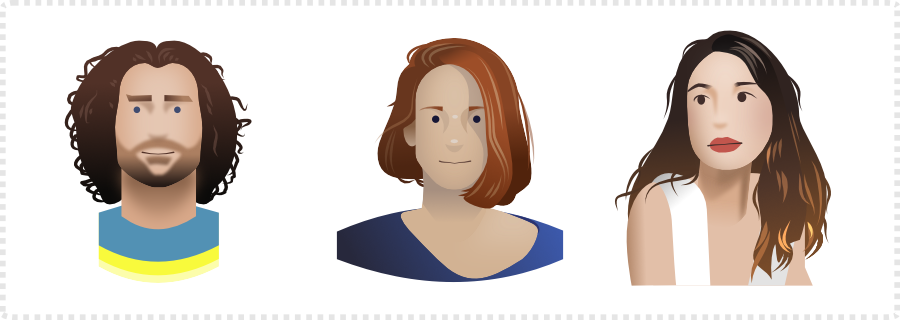
Let’s get started with vector portraits
Initially, this tutorial is based on designs I originally did in Affinity Designer. As I am using basic tools and no advanced effects, I am trying to change my usual format and make it a more general tutorial to work with Inkscape, Adobe Illustrator, CorelDraw, or any other vector design tool. Ulitmately, most vector art tools use a very similar workflow. Names for their tools might be slightly different. Yet, the handling of shapes or paths is nearly identical. I am trying to take that into account and make it as easy as possible to follow this tutorial in the tool of your choice.[It would be very helpful if you can let me know in the comments what you think of this approach. I am not sure if it’s the way forward or sticking to more specific tutorials for just one tool is the better option.]
Basic tools

Simplified male portrait
As a start, I chose a frontal portrait with strong features. Firstly, lower the opacity of the image to show your design more clearly. Lock the photo or layer to avoid accidentally moving it. This way, adding basic shapes on top is easier. Faces are most commonly square or circular. Let’s create a rounded-edged rectangle for the face, another rectangle for the neck, and a third one for the shirt/ chest. A rough ellipse will be the base for the hair.
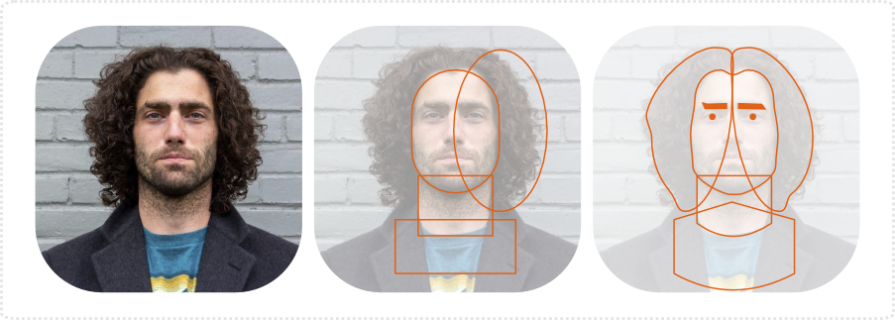
Convert the shapes to create editable curves [paths in Inkscape]. Add nodes and adjust the shapes to better match the photo.
Another two circles will be the eyes and another two deformed rectangles make up the eyebrows.
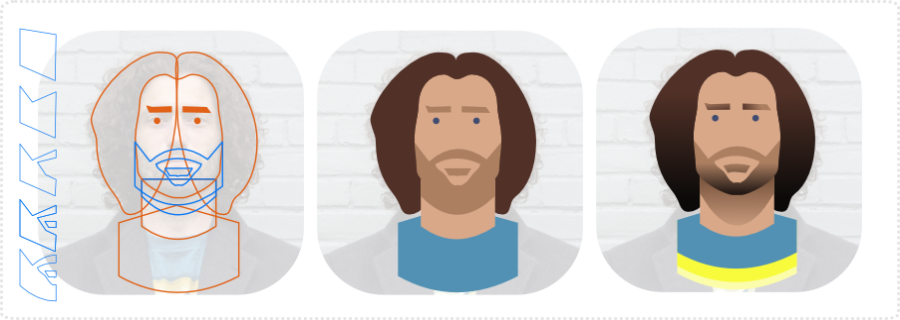
Keep it Simple
If you are unsure about drawing with the pen tool, build the elements from simpler shapes. You can quite often break down more complex elements like the beard and then add more nodes and deform. Working with mirrored elements is a great help.
With all major shapes in place, it’s time to add colour. Use a colour picker tool or skin reference palettes if you are not sure about the right tones. Afterward, add gradients to the colours, if you pick the lighter tone, shade to the darker, or vice versa.
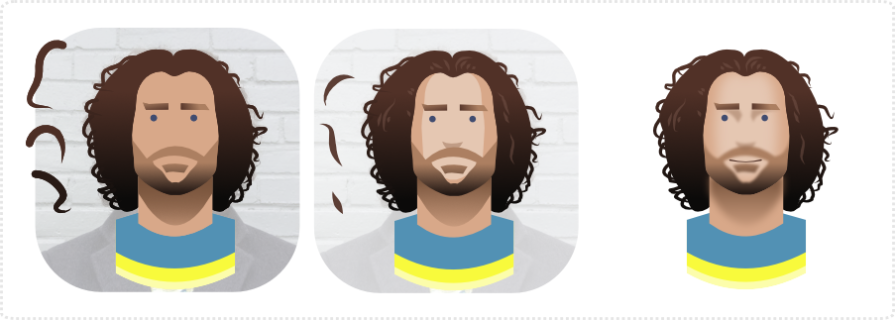
Add more detail to the hair. It doesn’t take a lot of shapes to get the idea of hair across. I used the pen tool and a tapered stroke and drew a few squiggles. Another lot in a lighter colour and with less curve create the highlights.
Finally, I duplicate the face and lighten it a bit more, blur it along with some of the other shapes like the beard, shadows under the chin, and the eyebrows.
Note:
I find it easier to work with clipping mask than match shapes via Boolean Intersection. E.g. I clip the beard to the face or the shadow under the chin is a clipped to the neck.
Simplified female portrait
The female portrait I picked has a more pill shape base, rectangles for the neck and shoulders, and a circle as a base for the hair.
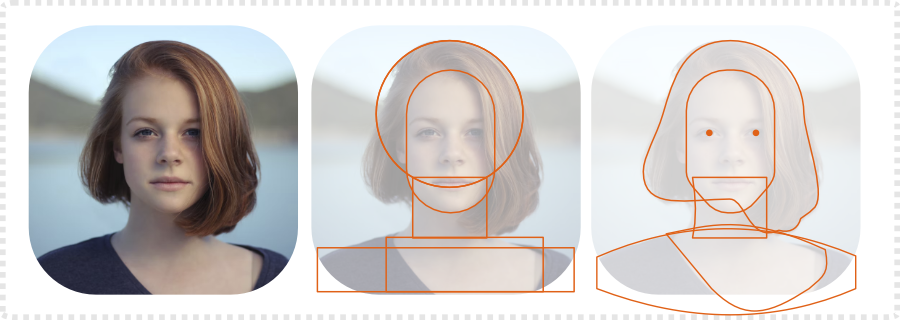
Again, I convert the shapes to create editable vector object. Add nodes to the hair and and adjust it to match the photo. I modify the chin and align it with the photo reference.
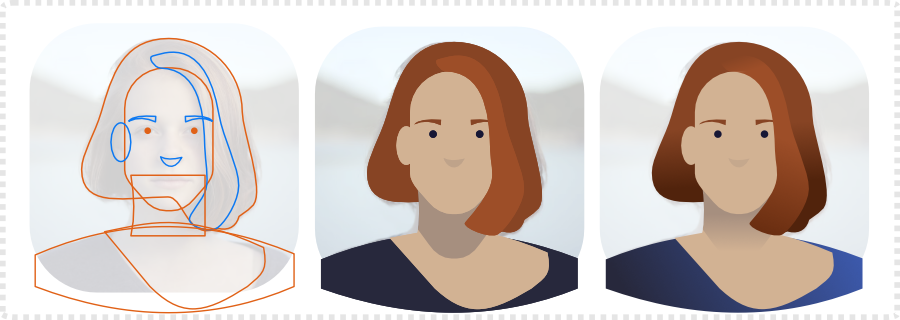
Next, I add the nose, ear, eyebrows, and the lighter strand of hair on the top. The same step as before applies with the colour. You can skip the gradients if you are aiming for a plainer look or work with technical restrictions in mind.
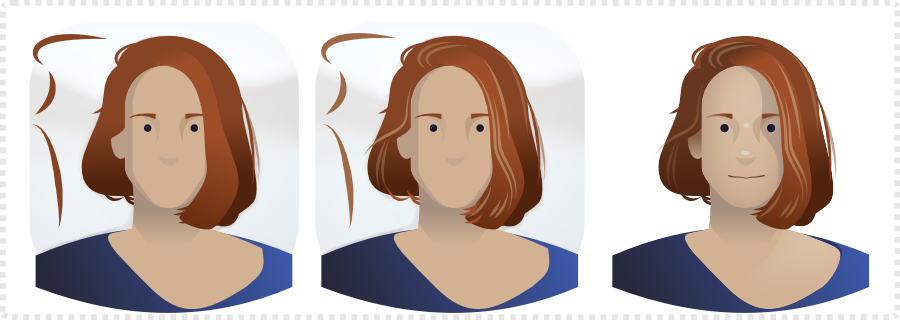
Tapered lines created with the pen tool/ bezier tool for more control [and fewer nodes] add variation and texture to the hair. I can straighten and shape these easier with fewer nodes and create the ‘straight’ hair look with just a bit of wave.
Note:
Shading colours [especially with skin tones] can be tricky and adding too much white or black quickly turns them into a ‘dead’ colour. You might want to try using different blend modes for the colours. The default usually stacks colour on top mixing them according to their opacity level. Changing to e.g. ‘Multiply’ for shadows mixes the colour with the colours of the shapes below and allows for warmer mixes. ‘Add’ works nicely enhance lighter colours.
Simplified female portrait with a turn
Working directly on top of the photo makes it a lot easier to adjust to angled, tilted, or turned portraits.
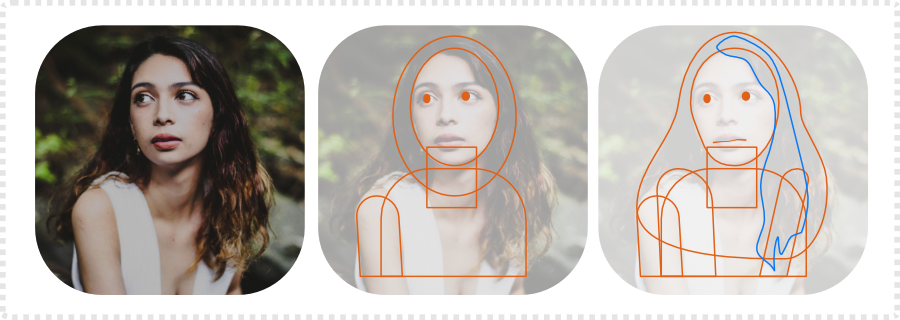
The process remains the same. It starts with roughly set up base shapes that are easily adjustable.
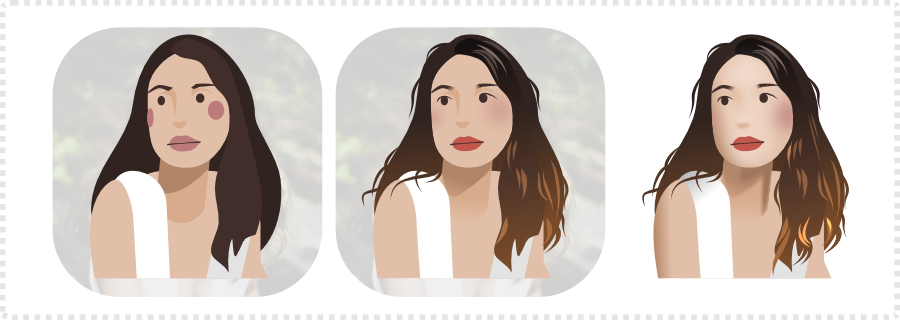
Colour, detail, and a little bit of shading quickly and easily turn it into a recognizable portrait .
Conclusion:
It’s very easy to get lost in detail, especially when working on simplified portraits. Make it easier for yourself by working straight on top of your reference image. Start with simple shapes and fewer nodes and add to it. That way your design remains manageable and easy to edit. Less can be more when it comes to details. You don’t need to draw every hair. Surprisingly, a few well-placed lines can convey the idea just fine.
Note:
For more advanced shading and detail this video tutorial I recorded earlier might be helpful:
Shading a game character’s face in Affinity Designer – video tutorial
As usual, I hope you enjoyed this quick tutorial on creating simplified portraits using basic shapes. Give it a try! I find it way more rewarding than some avatar builder app. :)


This is brilliant, thanks so much! I always struggle with adding too much detail, so seeing how effective it can be with just the simple shapes – especially for the eyes and mouth etc is really helpful