


Emulating a Watercolour Effect in Affinity Designer
Affinity Designer Tutorial
This quick tutorial is all about emulating a watercolour effect using vectors in Affinity Designer. The idea came about from a question asked in a social media group: “How can I turn the watercolour images transparent?”. The images in question were two JPG images of nice watercolour gradients that needed to overlap. Due to the restrictions of the file format [JPG doesn’t allow transparency], the obvious answer was a clear ‘No it can’t be done.’. The first idea to get it working was by turning the blend mode to ‘Multiply’ or ‘Colour’ which takes out the white. At the same time, it alters the colours though, making it more of a crutch than a solution. The plan to use watercolour brushes in the pixel persona didn’t quite succeed either. It also was not flexible enough for quick editing.
Vectors are the way to go…


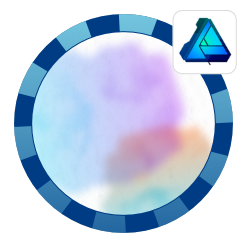
For this first watercolour blob start with any shape you like, give it a gradient fill, and then set the transparency down [e.g. depending on the colour 20 – 30%].
Add more nodes to make the edges uneven.
Set a soft blur that’s not too strong. Using the pencil tool, add a few uneven squiggles and match their colours to the gradient of the base. Add transparency to make just some edges stand out, blur the elements and adjust their transparency as well.
These shapes add unevenness to the watercolour effect.


Group the elements and duplicate the group. Edit the gradient and the colours of the shading squiggles.
When overlapping the two shapes you should get the nice colour mix specific to water colour paintings.
Colours
Play around with colour gradients [blue to purple, green to blue, red to yellow, etc.] and the blend modes [e.g. try ‘Multiply’ or ‘Pin Light’] of the group.
Note:
It has to be ‘Normal’ when you want to keep your design transparent. The other blend modes will require a background below them to work in PNG.


Pitfalls
Stacking the colour will eventually lead to ‘messy’ tones. Try and keep the colours in similar shades and use contrasting colours sparingly.
You can add a water-colour paper texture below the shapes for an even more realistic effect [if you are willing to sacrifice the transparency].
Another aspect that defines the watercolour style is the darker colour around the edges, where the pigments ‘pool’ in the borders between wet and dry.
The easy way is to duplicate the base shape, adjust the transparent gradient to just show one edge. Alternatively, create a duplicate of the base shape, move the nodes an edge in an interesting pattern, add a blur and a transparent gradient.

Note:
Use reference images when you create your effects. Google image search is a very helpful resource. “Watercolor transparent” came up with some nice results for me.
Colouring in a Sketch
As a quick example of the effect in action, I took a sketch I have done in Affinity Designer’s pixel persona a while back and coloured it in watercolour fashion.

This little monster was created with an ink brush and my graphic tablet. It’s one of many quick doodles I create to send out to friends and family.
In order to show the effects better, I took off the drawing and just show the colours in the next few screens.
Using the pen tool, start with the basic shapes, draw the shape [not too exact, overlaps and white areas are part of the character of watercolour paintings].


Add a soft blur – not too much to lose the shape but enough to soften the edges.
Squiggles
Add the ‘squiggles’ to add pattern and texture to the colour. I reused the same 6 shapes from earlier, coloured, scaled, rotated, and changed their transparency. There is no real need to create too many different shapes.
Cheating
I added white tapered lines for some highlights in the hair, around the mouth, and on the horns. Ideally, you want to create these areas as holes in the shapes to retain the transparency of the colouring. Let’s consider them ‘white gouache’ added on top for now. :)


Playing around with the colours and the backgrounds or adding drop shadows can lead to interesting results.
I hope you liked this first part of the watercolour tutorial. In order to keep with a certain [somewhat compressed] length, I decided to split this into two parts. The next segment will cover a more painterly approach. I hope to put this one up as soon as possible.
In the meantime have some fun with this hack. It might look a little more involved but there is a lot you can create with this effect once you got it set up. Enjoy!


The result looks surprisingly realistic, im impressed !