Creating dynamic picture and photo frames for mockups in Affinity Designer
Affinity Designer Video Tutorial
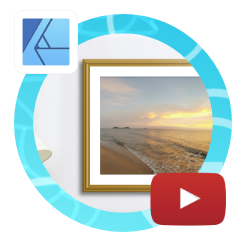
This is a quick video tutorial from 2Dgameartguru on creating dynamic picture and photo frames for mockups in Affinity Designer. The topic was brought up in a social media post and though a variety of approaches was posted neither one seemed easy and versatile enough. Affinity Designer has some great features that seem tailormade for this problem though.
A photo frame can be easily created with a rectangle and a stroke. The stroke will adjust when the rectangle is scaled [and the ‘scale with object’ is turned off]. The same goes for a contour. Add a drop shadow and a bevel effect to the mix and it’s starting to look like a realistic frame.
Note:
When working with photos as backgrounds or part of the design, make sure you adjust your lights according to the photo. I missed that part in the video [when starting out to create the frame]. It doesn’t take much to adjust but keeping the light sources in mind from the start makes it a lot easier.
Keep the picture frames easy to adjust and dynamic
The key element when you create a template-style design like this is flexibility. You want to be able to adjust the design quickly and easily to match the next project. Working with elements that scale and keep their proportions is essential with the frame designs. The textured part in the video shows the issues, once you expand the stroke to curves to add the texture. Scaling needs manual adjustments and thereby becomes a lot more time-consuming and less flexible.
So, keep things simple!
It pays to spend a little time planning the design before jumping in headfirst.
I hope the video on creating photo and picture frames for mockups in Affinity Designer. There are a zillion more options, colours, added details, textures, and shapes to explore. Give it a try. Enjoy the ease of Affinity Designer rather than try and make template files work for your designs. Ultimately, it’s all about having fun with your design. Making it shine in a nice mockup screen is well worth a little time to play around with all the options Affinity Designer offers.
Of course, the same effect can be created in Affinity Photo, and with some adjustments in other vector design tools such as Adobe Illustrator, CorelDraw or Inkscape.


