


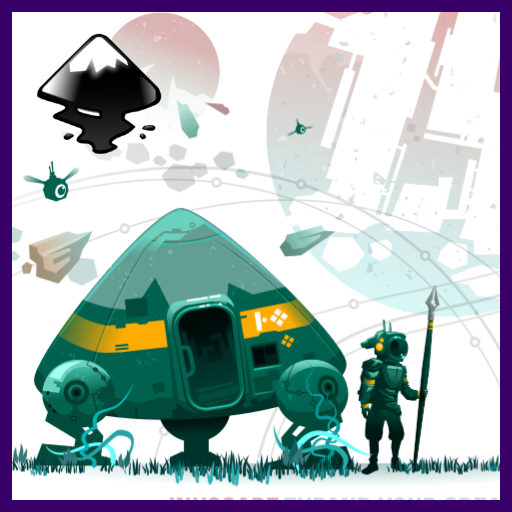
Creating Space Backgrounds
Inkscape Tutorial
This is another tutorial request (as well as a long time item on my to-do list) – creating a space background using Inkscape. It’s a common assets for most space themed games and can be created easily and tileable in vectors.
I set my document up to work in px as measurements. That way, I know it will work straight in the game. Adjust the setting in the top menu bar. They usually are set to inches or mm by default.

Let’s get started with creating space background…

Let’s start with a rectangle for the background. Set it up in the desired size. I used 800x600px for mine.
Note:
For easier handling (as there will be rectangles added on top) I added a small ‘handle’ for easier selection.
Just a rounded rectangle added on the lower left and combined with the background element.
A duplicate version of the group is flipped and colour in a greenish tone.
Using the gradient tool create a linear gradient to fully transparent, dragging from the lower right upwards (~11 o’clock).


Duplicate both the black and the green element and flip them vertically.
Add e.g. a purplish tone and a blue to those two new elements and adjust the gradients until you get a setup you like.
Note.
You can also do a radial gradient on one e.g. to have a distant sun.

The top right and left and the lower middle and right samples use radial gradients. You can also add circles with a radial gradient on top of the coloured rectangles to create more detail. Keep in mind that this is supposed to be a background and the main gameplay elements as well as the UI need to stand out on top. Making the background too elaborate or too bright might draw focus from the more important game elements.
Experiment
When it comes to finding the right colour combination, it’s a matter of trying and seeing what works. Remember, Google images is your friend! If you are stuck, have a look at some images of space theme games or actual nebula photos. Try colour schemes that work in those shots, vary them and build your own from there.
When creating space backgrounds, keep in mind that usually, the background is not the main focus of the game. Too much colour, detail or contrast can easily distract from the gameplay.

Adding a Nebula

When you are happy with your colours lock the background layer and add a new layer for the nebula.
Use the freehand tool (F6) to draw a random shape (trying not to have it intersect itself). This shape will be blurred later, so don‘t worry about its exact shape.
Reduce the nodes via Path/ Simplify (CTRL + L).
Duplicate the shape a few times. Scale, rotate and colour those elements to create a random pattern.
Note:
If you need a tiling background check the approach in one of the earlier tutorials about making a tiling pattern.


Lock the nebula layer and create a new one above for the stars.
The stars are a bunch of circles placed randomly on the background.
Note:
I find it easiest to create a small number first and then select those, duplicate them, rotate and move them around rather than draw each star separately.

Library elements
The stars a great example of a reusable element. Saving them as a separate file in a “library folder” will make it easier to find them for future projects. E.g. the stars can be duplicated a few times, rearranged and altered a bit and work as snowfall in another scene. Alternatively, they can change colour and become the freckles on a portrait.


Using the stars and polygon tool add a few star shapes.
Note:
By moving the inner handle towards the centre you can make the stars more pointy.
You can also adjust the corners in the menu bar.
Lock the stars layer and create another layer for a planet.
Starting with a circle and two slightly smaller duplicates in the lower left.
Note:
You might want to check out the earlier tutorial about rings of Saturn when creating planets.


Using the freehand tool draw another random shape on the planet. Simplify the path and adjust if needed. This shape will later be blurred as well, so don’t worry too much about it looks.
Note:
As it will be visible in the lower left, I just added detail to the top right of my planet.
Add a few more circles for detail to the dark shape and some more as highlights on the top right rim.

Adding detail

Use the gradient tool to colour the planet with a radial blue to lighter blue for the outer circle and a very dark desaturated blue for the other two with 50% opacity.
Set the black and white details to 50% opacity as well.
Lock the planet layer and create a new layer for some asteroids.
Using the pen tool, draw a simple shape.
As these elements will be background elements avoid too much detail as they would only distract


Duplicate the asteroid shape, scale, rotate and move them around to create a small cluster.
Duplicate the cluster and creating more variations for a more distant version.
Note:
As with all elements, play around and find a cluster shape you like.

Adding blur
Inkscape has the cool functionality of adding blur while keeping objects editable. I like to add it late (preferably as the last step) in the project. Saving a non-blurred version of the file might be a good idea. I find it easier to edit more complex shapes or large numbers of objects that way.


Save a version of the file before starting to blur elements. I prefer to keep a clean version to fall back on in case I want to reuse elements.
Select elements (e.g. the nebula) and start blurring (Filters/ Blurs/ Blur…).
The range I used for the blur was between 5 for the nebula to 1 for the planet and stars.


Get the source file [svg, pdf, affinity and cdr] for this project for free!


Hi Chris,
Thank you for this tutorial.
I have a question: sometimes i find useful to not blurr a background image and simply export it at a relatively low resolution. When I import it in the game engine, I scale it to the big dimensions required by the background and the image is naturally blurred due to its low res. In this way I also lower the memomy required to run the game. What do you think about? Is it kind of a good practice or does it lead to poor results?
Hi… It's a totally ok way to do it… and it works with a lot of blurred elements e.g. shadows, particles, clouds etc. As soon as you have elements in the scene though that need a sharper look – e.g. a depth of field where the mid ground is sharp, the distance and the very close-up elements are blurred – it stops working though.
Thanks for the tutorial! I've been able to create some really nice looking pieces with it.
I am glad my ramblings helped.
Hey, I really appreciate your tutorials, but most of the pictures on this page(except the last one) are low quality(blurry). I remember checking this page maybe 2 weeks ago and everything was fine back then. Can you do something about it?
Cheers
Mateuz, I switched over from blogger to wordpress a week ago. It has to do with some of the transfer not working 100%. I am still fixing those issues… It just takes a little longer than I had hoped for…