


Gradient Vector brushes in Affinity Designer
Affinity tutorial – part 4
Following the basics in part 1, the dragon scales in part 2 and the image patterns in part 3, this time I will show you what can be done with gradients. Images using gradients make great vector brushes in Affinity Designer. More or less complex gradients as the base for the PNG image lead to very nice effects. This approach was the result of a question on social media. A curve had to loop while the colour changes follow the curve.
Main tools used in this tutorial

Note:
Affinity Designer calls these brushes ‘vector brushes’. In reality, they are no vector shapes. The brushes are bitmap images scattered or stretched along a vector line. They work fine for illustrations to add detail and pattern to your design. Yet, these brushes can not be expanded to curves like a normal, solid stroke. It is, effectively, a bitmap object in your vector design. Consequently, this may cause the usual limitations when it comes to scaling or exporting for cutting or lasering.

Let’s start…

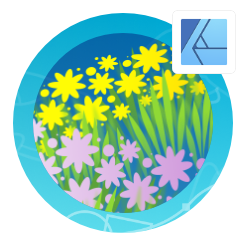
Create a rectangle and give it a gradient.
Add another colour node in the centre…
and another 2 either side. For this brush pattern, you want to create a gradient with visibly different colours.


Export the pattern as a PNG [File/ Export]. I exported these gradient images at massiv 2500px x 100px with 72dpi.
Go to the ‘Brushes’ panels and click on the menu icon [top right]. Select the ‘New Textured Image Brush’ option and choose your brush pattern PNG file.
Click on the brush to open the settings. Alter the ‘Size Variance’ to allow the brush to react to pressure and set the ‘Body’ to ‘Stretch’.

Testing the texture brush…

Let’s try the brush on a curved line.
Create the line, select it, and clear the stroke color [should it have one]. Otherwise, it will overlap the texture.
Click on the brush to assign it. You can adjust the pressure cure in the stroke settings to create a tapered stroke.
Why go through this trouble when you can do this with a normal stroke and a gradient? The answer shows when you curve the line into a loop. A gradient will only allow for a linear or elliptical colour distribution…


… while the vector brush with the gradient will follow the curve and change it’s colour along the length of the curve.
This allows for some interesting effects when you e.g. add sharper turns to the line.
Here you can also see the difference the gradient makes. I created two brushes with the same gradient. Yet, one of them is flipped horizontally.


You can also add more detail to the PNG image to create interesting and instant effects. E.g. this one has one half darkened with a copy of itself but the blend mode is set to ‘Multiply’.
Another example of an overlapping curve is this spiral shape. I create a flipped brush for this one as well.


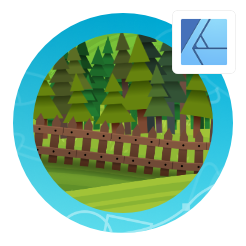
You can add gradient brushes to shapes to quickly create interesting design elements.
Another nice effect is achieved with additional shapes on top of the brush.


Variation is everything
Try different designs, mix gradients and patterns, create a lot of different brushes to see where it can take you. You can make the gradient seamless by starting and ending the gradient’s colour with the same colour. This allows you to set the brush’s ‘Body’ to ‘Repeat’ without creating a visible break in the pattern.
Note:
Adding adjustment layers to the brush lets you change the colour, shade it, or brighten it up without the need for a new brush image. For this image, I just altered the saturation in an HSL adjustment layer to take the pink to blue, orange, and green.
Download gradient vector brushes in Affinity Designer
You can download the vector brushes and PNG files
along with the samples from this tutorial here.
This concludes the fourth part of vector brush creation tutorials ‘Gradient Vector brushes in Affinity Designer’. I hope you enjoyed the tutorial and it inspired you to try some vector brushes in your own designs. Take it from me, it’s a lot of fun!
Your feedback, comments, and requests are most welcome. Enjoy and keep on creating amazing art!


Another beautiful looking tutorial !
Thanks Chris !
I was thinking how to introduce a bit more variation into the pattern element and there are these tutorials by Texturelabs and Spoongraphics which show a new approach.
Basically they take a grayscale texteffect and colorize with a gradient map adjustment. But the killerfeature is really a gradient overlay and various textures to give it that interesting and unexpected variation.
I did a bit of exploration here:
https://forum.affinity.serif.com/index.php?/topic/144606-applying-a-gradient-map-to-a-text-with-fx-without-affecting-the-bg/
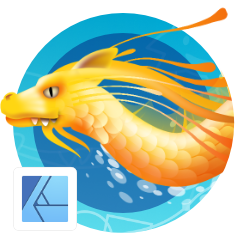
Imagine you make a scale patternbrush and turn it into a snakebodied dragon. Then add a small bevel or an Inner Shadow, so each scale has a bit more structure and colorize with a gradient map adjustment any way you want. To introduce more texture, clip a suitable image, etc, and vary the colormapping with another clipped gradient.
This could bring the whole effect to another level !
Here’s a demo of what i had in mind:
https://i.imgur.com/eFWJnCe.jpg