Applying smooth shading and detail
Affinity Designer Tutorial
This tutorial will show the process of applying smooth shading and detail in Affinity Designer while revisiting some of the old [very old] tutorials I wrote. It’s already been a while since I did some tests with characters and designs from my old tutorials. I reworked the stone age man and the dinosaur and will post tutorials [maybe even a video] of the process later. For now, I want to start with the very first tutorial about circles and show you how adding smooth shading can take your designs to another level.
Before we start
Probably the most used function in these ‘polishing’ tutorials will be the clipping of elements. I love to keep things inside shapes – to group them, to restrict them, and yet be able to easily adjust them. If you are unsure about the clipping or clipping groups, have a closer look at the topic [my tutorial is more than a wee bit outdated]. Another favorite of mine is the pressure-adjusted stroke. I use the pressure profile to turn the ends of a stroke thin. It’s very versatile when it comes to rim lights, folds, or odd strands of hair. Combine that with blurring and different blend modes (‘Multiply’ to darken and ‘Screen’ or ‘Ovelay’ for highlights) and you have the main tools for this tutorial.


Let’s start shading
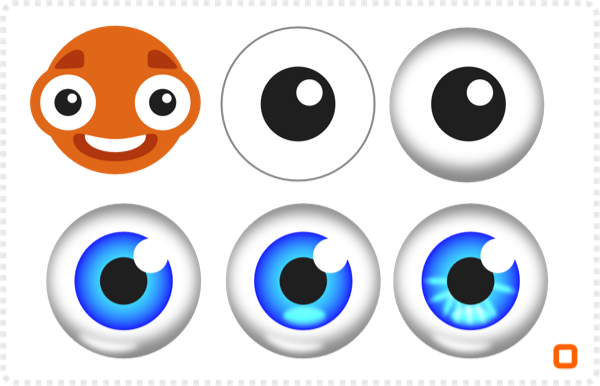
Start with the eye. Duplicate the white and scale it down a little, blur it, and place it inside the darkened original.
Duplicate the iris and give it a radial gradient.
Add a few more slightly blurred ellipses for more shine and detail.
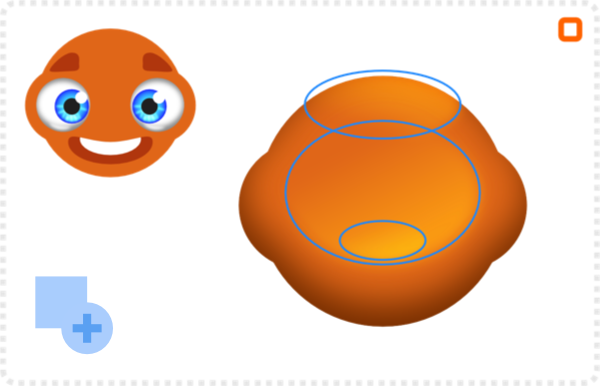
After combining the three elements of the head into one shape via Boolean ‘Add’, duplicate the shape and blur it.
Darken the original and place the lighter, blurred shape inside.
Add three more circles, blur them and add a transparent gradient for additional shading.
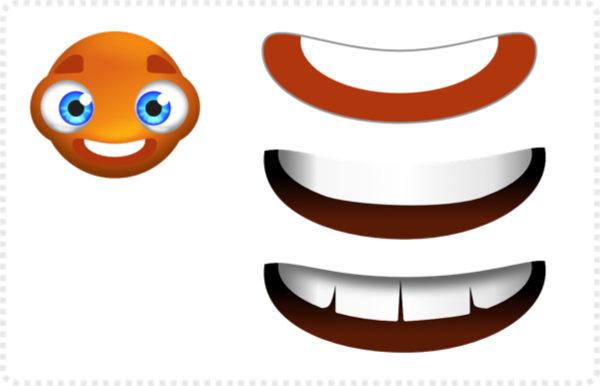
Give the mouth a bit more depth through a darker colour and a gradient.
The same works for the teeth. Set a linear gradient with darker sides and white in the centre.
A darker duplicate with blur sits on top as a shadow.
A few gaps – created by adding more nodes to the teeth shape – are a nice detail.
The eyebrows should be darker to match the shaded base. A bit less height and more of a curve should fit the design nicely.
A gradient and some tapered strokes add the final touches.


A bit more detail

A few blurred strokes on the sides and top and bottom for added highlights.
I like to set the layer blend mode for those to ‘Overlay’or ‘Screen’ to mix with the colour below.
After the highlights, add a few shadows.
Two circles behind the eyes in a darker orange [set to ‘Multiply’ and blurred] and a duplicate of the mouth shape [with the teeth removed] in the darker colour, blurred and set to ‘Multiply’ add additional depth.

Finishing up the shading and detail
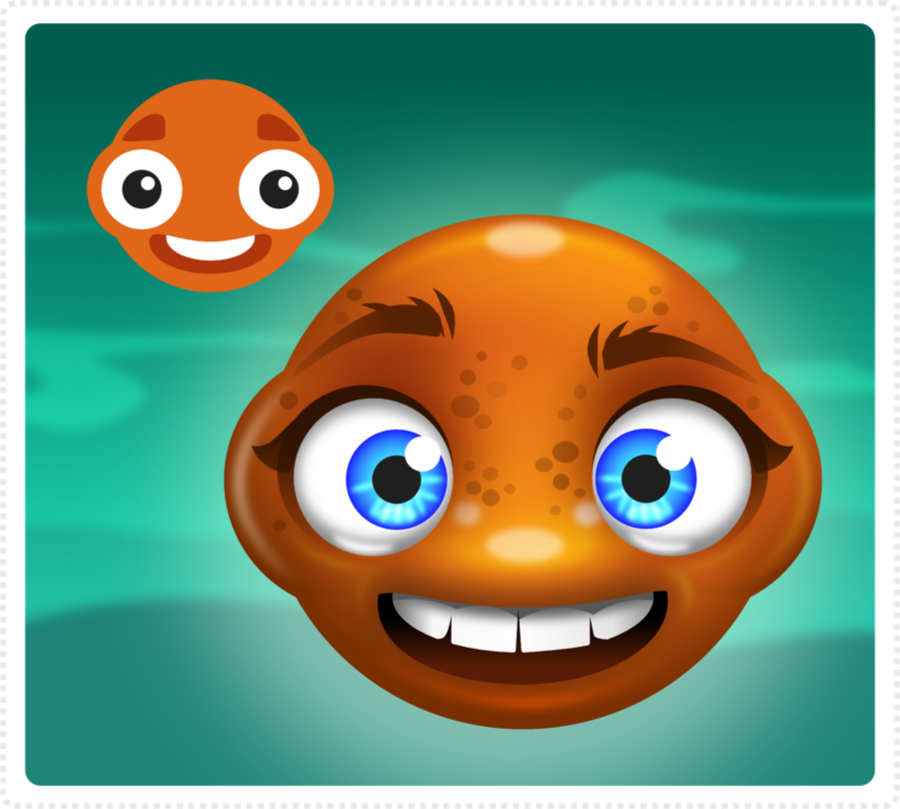
Add more detail like the freckles made of transparent circles [20%, 30% and 40%] in different size, group them, and set the group blend more to ‘Multiply’. The eyelashes are a circle below the eye with a small triangle [curved to flow with the circle] and a transparent gradient towards the bottom.
As always, I had a lot of fun with this and it’s amazing what you can do with Inkscape these days. 10 years after I wrote the initial tutorial on creating game art for programmers with Inkscape.
Ultimately, I hope you enjoyed this and can use some of the workflows for your own creations!
