Creating a simple coffee stain in Affinity Designer
Affinity Designer Tutorial
This quick tutorial takes a simple coffee stain to showcase the power of the stroke pressure in Affinity Designer. A stroke’s thickness can be varied easily in Affinity Designer by altering the pressure graph in the stroke dropdown menu. A simple tapered stroke [where both ends would be pointy] can be taken to new levels by going wild on the pressure graph.
Main tools for the task
![tutorial_090_coffee_stains_h 2dgameartguru - creating simple coffee stains](https://2dgameartguru.com/wp-content/uploads/2021/06/tutorial_090_coffee_stains_h.png)
![blank_smaller 2Dgameartguru - spacer](https://2dgameartguru.com/wp-content/uploads/2021/08/blank_smaller.png)
Let’s get started…
![blank_smaller 2Dgameartguru - spacer](https://2dgameartguru.com/wp-content/uploads/2021/08/blank_smaller.png)
![tutorial_090_coffee_stains_a 2dgameartguru - creating simple coffee stains](https://2dgameartguru.com/wp-content/uploads/2021/06/tutorial_090_coffee_stains_a.png)
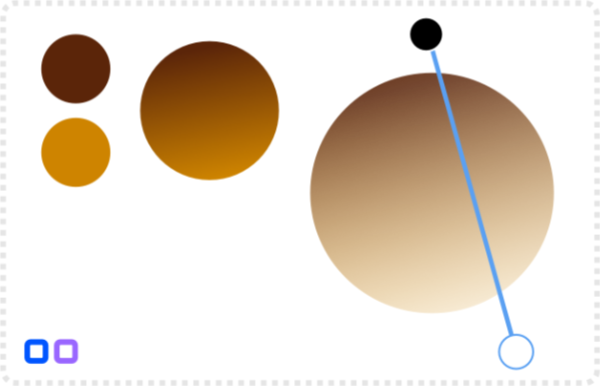
Let’s start with a circle and give it a gradient fill in a dark, warm brown.
Add a transparency gradient to it. Fading it towards the bottom.
Swap the fill and the stroke colour by clicking on the little arrow icon.
Set the stroke to a good size to form a ring.

![tutorial_090_coffee_stains_b 2Dgameartguru - creating a simple coffee stain](https://2dgameartguru.com/wp-content/uploads/2021/06/tutorial_090_coffee_stains_b.png)
![tutorial_090_coffee_stains_c 2Dgameartguru - creating a simple coffee stain](https://2dgameartguru.com/wp-content/uploads/2021/06/tutorial_090_coffee_stains_c.png)
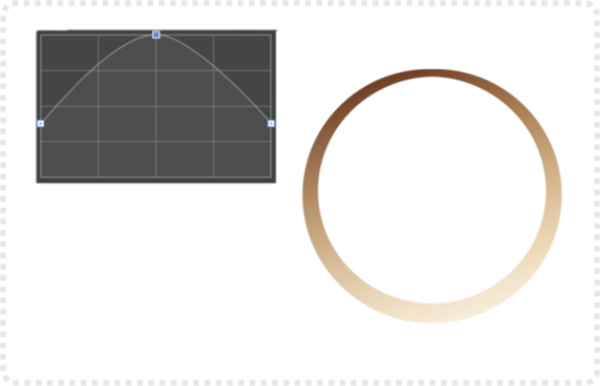
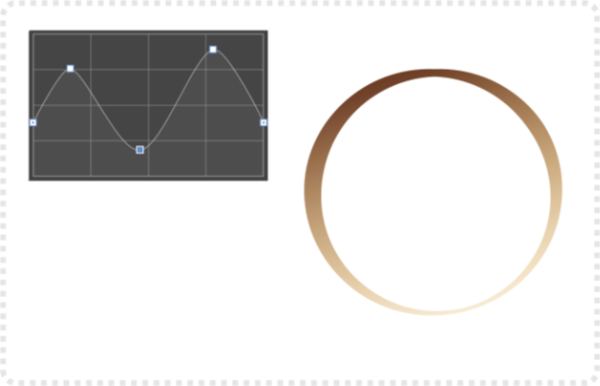
Open the stroke panel by clicking on the stroke display and then open the pressure graph [by clicking on the graph display].
The default graph consists of two nodes on the left and right. Move them down and click in the centre to add another node and move it up to create a tapered stroke.
Add more nodes and create a wave shape.
The ring gets more deformed the more nodes and waves you add.
![tutorial_090_coffee_stains_d 2Dgameartguru - creating a simple coffee stain](https://2dgameartguru.com/wp-content/uploads/2021/06/tutorial_090_coffee_stains_d.png)
![tutorial_090_coffee_stains_e 2Dgameartguru - creating a simple coffee stain](https://2dgameartguru.com/wp-content/uploads/2021/06/tutorial_090_coffee_stains_e.png)
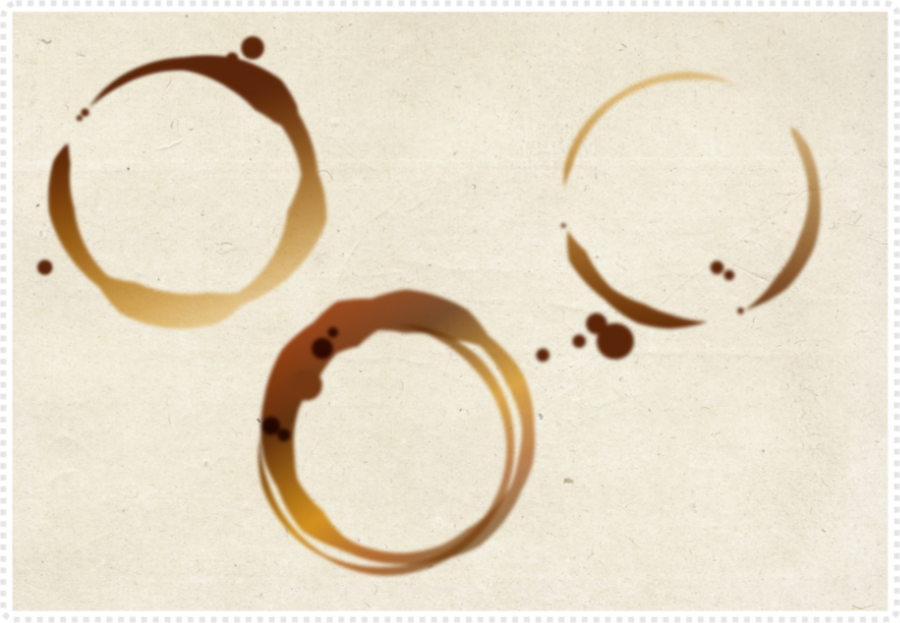
Go wild! By pulling nodes to the very bottom you get a break in the stroke and create gaps in the shape.
Add a little Gaussian blur and some circles to get closer to a real-life coffee stain.
![tutorial_090_coffee_stains_f 2Dgameartguru - creating a simple coffee stain](https://2dgameartguru.com/wp-content/uploads/2021/06/tutorial_090_coffee_stains_f.png)
![tutorial_090_coffee_stains_g 2Dgameartguru - creating a simple coffee stain](https://2dgameartguru.com/wp-content/uploads/2021/06/tutorial_090_coffee_stains_g.png)
Play around with the pressure, add more steps to the colour gradient or more gaps to the ring to create variations.
![blank_smaller 2Dgameartguru - spacer](https://2dgameartguru.com/wp-content/uploads/2021/08/blank_smaller.png)
The pressure graph is a fun feature to play with. I frequently use it to create wood grain textures, waves, and ripples or plants and leaves. Give it a try! Enjoy!
![blank_smaller 2Dgameartguru - spacer](https://2dgameartguru.com/wp-content/uploads/2021/08/blank_smaller.png)