


Vector brush creation in Affinity Designer
Affinity tutorial – part 2
In the first part I went through the basic creation of simple vector brushes in Affinity Designer. This tutorial will be a little more complex. Ideally, the vector brush will be used for a scaly snake, dragon body. A task that is rather time-consuming when doing manually as you need to adjust the scales to the curve. The need to bend and scale to match the body. With a scale pattern on a curved line, the pattern will follow the line and remain editable with ease.
Just as in part 1, this will be another ‘Textured Intensity Brush’. First up, let’s create a black and white scale pattern.
Main tools

Note:
Affinity Designer calls them ‘vector brushes’ but are no true vector shape. The brushes are bitmap images scattered or stretched along a vector line. They work fine for illustrations to add detail and pattern to your design. It can not be expanded to curves like a normal, solid stroke anymore. It is, effectively, a bitmap object in your vector design. Consequently, this causes the usual limitations when it comes to scaling or exporting for cutting or lasering.


Let’s make some vector brushes
Start with a black square and add some scale pattern.
Make the individual scale a symbol for easier alterations.
Note:
You want to make sure that the pattern is seamless – connecting the left and the right side of the design without visible breaks or lines.
As the brush will only tile horizontally, we want the top and bottom to fade.
Group all scale shapes and use the transparency tool to create a short gradient in the top. Group this group again and apply the transparnecy to the bottom.


For a bit more detail, edit the symbol. Duplicate the scale shape, convert it to curves and add another node in the middle of the left side.
Delete the bottom nodes to turn the duplicate into half of the original.
Export the pattern as a PNG [File/ Export]. I usually export the PNG as 512x512px at 72dpi.
Go to the ‘Brushes’ panels and click on the menu icon [top right] and select the ‘New Textured Intensity Brush’ option and choose your brush pattern PNG file.

Seamless patterns in Affinity Designer
I recorded a tutorial about seamless patterns a while back – “Quickly create seamless patterns“. I would use the same approach for a brush pattern that needs to tile just horizontally. There is no need for a seamless vertical tiling as the pattern will just be repeated along a line.

A new brush appears in the list of brushes.
For scales to work set the body to ‘Repeat’
and add set the ‘Size Variance’ to 100%. This way, the brush will react to the stroke pressure setting.
I also like to make the brushes a little bigger e.g. 256px.
Testing the brush pattern
Let’s try the brush on a curved line.
Create the line, select it, and click on the brush to assign it.
Adjust the stroke pressure by pulling down the right handle while holding the ALT key.
Add another node to have the pressure taper off at about 3/4 of the length.


Note:
The two lines – solid brush and pattern brush – set off by a bit show the pattern [and its transparency] on the solid brush as a base for the body shape.
Duplicate the line and make the stroke a ‘solid line style’, move it down below the pattern brush layer, and darken it.
Add gradients to both strokes. A darker version for the solid stroke and a lighter version for the pattern.

Duplicate the solid brush, expand the stroke [Layer/ Expand Stroke] to turn it into a curve. Use the curve as a clipping mask for the two lines.
Let’s add some shading with a darker and a lighter curve. A darker, thicker line with Gaussian Blur at the bottom [layer blend mode set to ‘Multiply’] and a thinner, white line at the top [blend mode set to ‘Add’].

Note:
I like to use clipping masks to contain the shapes, especially when using blurred shapes for shading and highlights. The Gaussian blur creates a much larger shape than is visible. Resulting in large [seemingly empty] areas when exporting.

Create a dorsal fin
Next up, is another brush pattern for the spine of the dragon.
A triangle and rectangle are the starting point. A transparent gradient towards the top will make the pattern see-throw.
Note:
This brush will also need to connect seamlessly. The triangle on the very left connects to the base on the right.
Let’s try this brush on a curved line.
Create the line, select it, and click on the brush to assign it.
Use a similar pressure setting for this stroke, tapering towards the end.


Place the line below the the scaly body shape and adjust the nodes to close gaps and adjust the overlap.
Add a matching gradient to the stroke.
I added a dragon’s head from an earlier tutorial, choosing the colours from my body shape.
A short line with the scale brush on the neck part of the dragon’s head connects it nicely to the base.

Note:
The dragon’s head tutorial was written for Inkscape but it does translate easily to Affinity Designer.

More decoration
Let’s add another brush. This time we go with a rectangle. Brushes in Affinity Designer can have any ratio and size.
Note:
Making your brush image too small might leave you with pixelated patterns, while very large brush images will inflate your filesize.
Assigning this brush to a curved line gives us a nice flowy element.
Adjusting the pressure to be smaller at the beginning and larger at the end spreads it out nicely.


Add those new lines to the dragon’s head – one below the head and one on top.
Adjust the stroke colour by turning it into a gradient with matching colours.

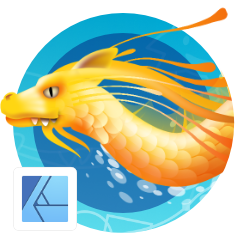
Lastly, I added some background and another simple dot-pattern brush below. We got ourselves a nice-looking dragon, with a very flexible design should we want to curve, bend, pose the body differently.
This concludes the second part of vector brush creation tutorials in Affinity Designer. I hope you enjoyed the tutorial and found it helpful. As usual, your feedback, comments, and requests are much appreciated.
Play with the workflow, create your own patterns, and have fun with Affinity Designer!


Great tutorial !
Also good for all kinds of snakestuff (tatoo designs, etc)