Character Design – focus on improving shading and contrast
Review and Affinity tutorial
This character design review is based on a social media post in an Affinity Designer group. The focus will be on adding contrast and shading. Arno Zöllner posted his design and asked for some input: “Any suggestions on how to add another layer of details to my alien? I’m somewhere in between liking the look and missing something that makes my alien interesting.”
I had an early morning and decided it would be nice to illustrate the ideas I had posted in writing prior. It’s easier to explain artistic things in a visual way. So, with Arno’s permission, I turned the feedback into this short tutorial. Hopefully, it’s helpful and gives some insights into quick and easy ways to improve your character design.
Let’s look at the design

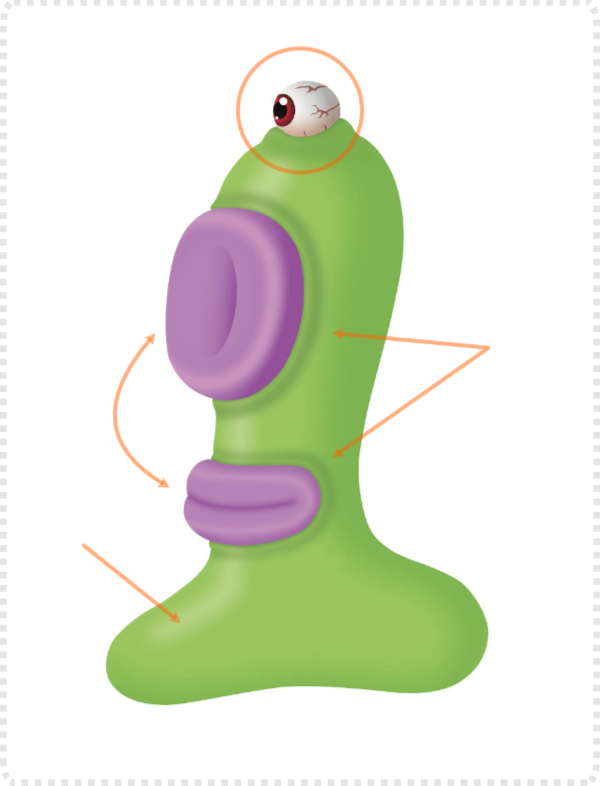
Arno’s alien has a unique design and he has put quite a lot of work into the detail [especially the eye] and the smooth shading.
One problem with the shading is the lack of contrast. It’s very soft and timid and therefore not helping define the volume of the green body shade. It still looks rather flat and two-dimensional. Stronger shadows and brighter highlights could bring out volume and texture.
The nose and lips [being the same colour and shading] are not that distinguishable. Their connection to the body feels odd due to the ‘outline’ shading.
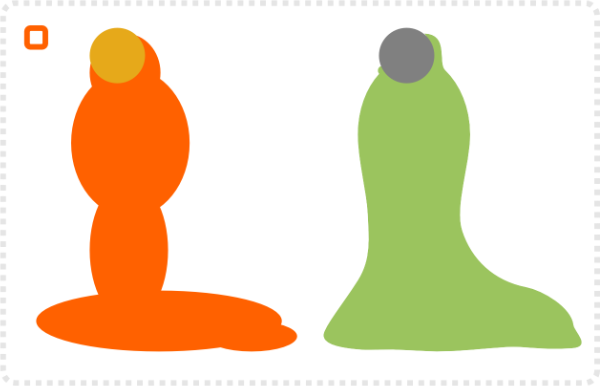
Basic shape
Let’s start with a little modification of the base shape. Assuming it’s a blob, I decided to give it more of a base, shift the body over to the left and extend it for an eye socket/ lid.
The new body is created from ellipses and combine with a boolean add. Excess nodes are deleted and the lines smoothed a little.
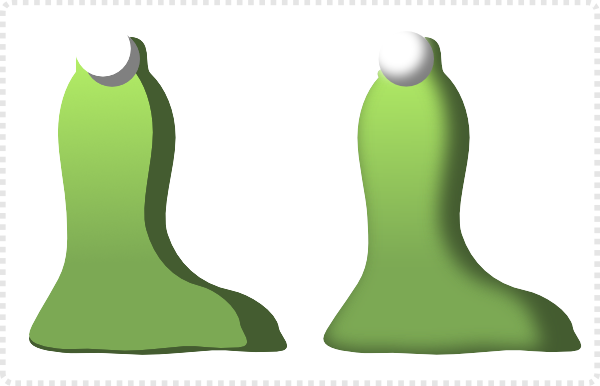
Duplicating the two shapes creates the base for the shading.
I darkened the green base quite a bit and added a gradient to the green [going into a bit more of a yellow to keep the colours more interesting].
Add blur and clip the lighter parts to the darker bases.
Eyeball
I took the design for the eye from another tutorial “creating a Pixar style eyeball“. Even though the tutorial was written using Inkscape, the same technique applies in Affinity Designer.

Focus on Contrast and Shading
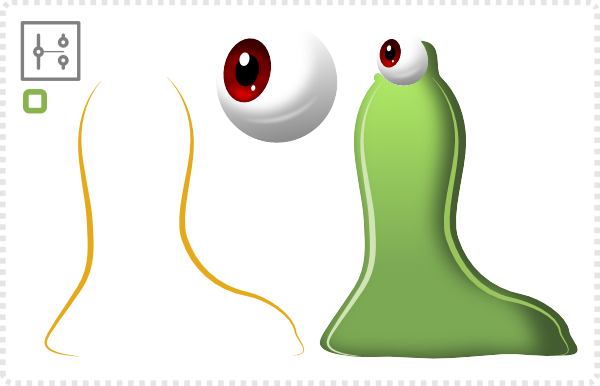
Duplicate the dark green base shape [and take out the lighter green in the clip].
Use the “Break curve” and delete nodes at the top and bottom to create the rim light shading.
Flip the fill to a stroke with an adjusted pressure – thinner at both ends.
Adding rim lights is an easy way to make objects look more interesting and give the illusion of a glossy/ shiny surface.
The level of blur defines its softness. Hard surfaces – like polished metal – would show little to no blurring. Softer objects – like wood or rubber – would have a lot more soft blur.
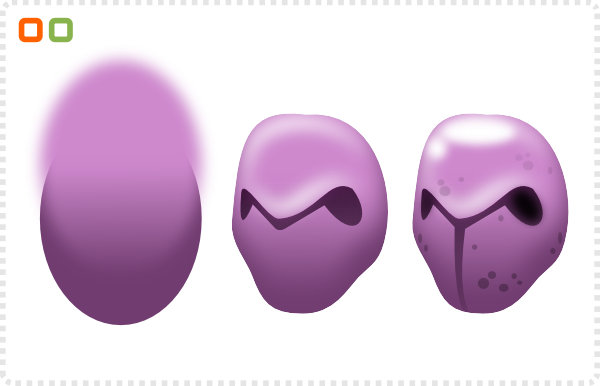
A darker circle, with the blend mode set to Multiply, for the eye and a lighter ellipse, set to Overlay, along with a short highlight line bring volume to the eye socket.
Note:
Using the same colour for a shape’s highlight and setting the blend mode to “Overlay” can produce vibrant shading.
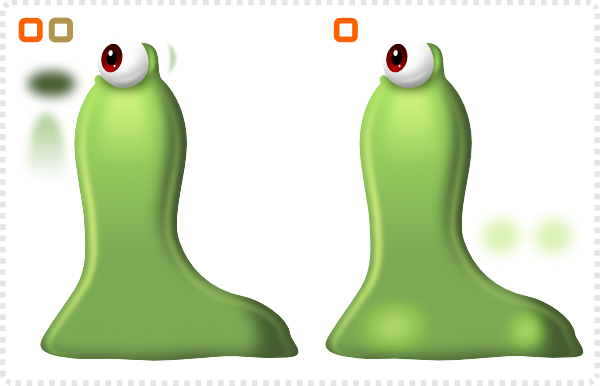
A few highlight ellipses add to the shininess of the character’s skin.
A vector brush and three lines [along the sides and the bottom] add to a texture/ pattern for the skin of the alien blob.
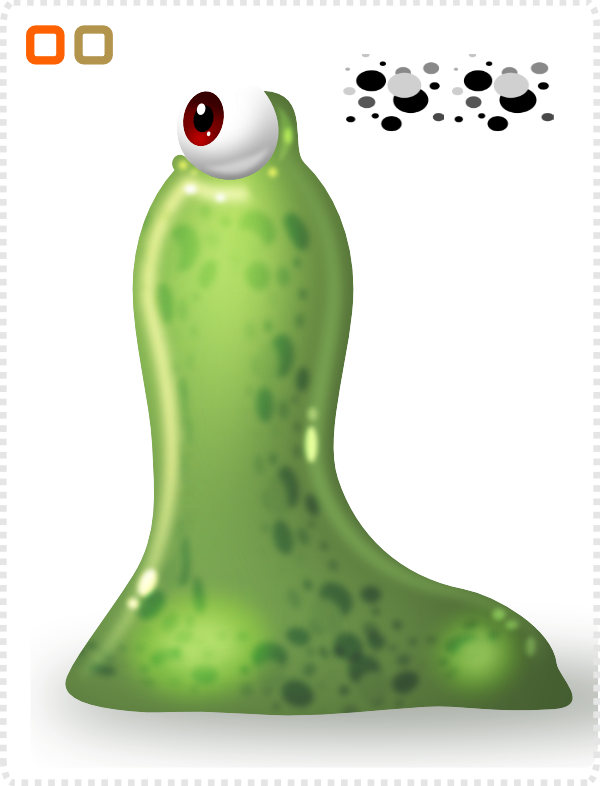
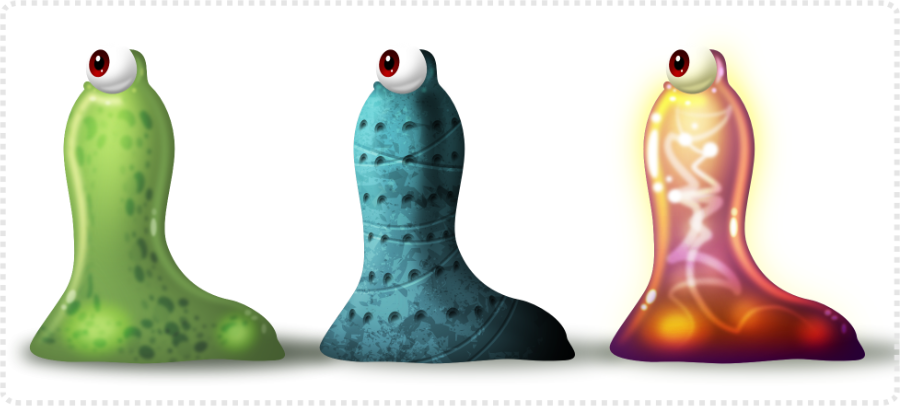
Defining Texture and Material
Adding the rim lights and the additional highlights creates the illusion of smooth, glossy skin. Reducing the highlights and taking off the rim lights, adding a grungy texture and detail changes the look dramatically. Alternatively, going the other direction and increasing the highlights. More glow creates a very different look and feel.
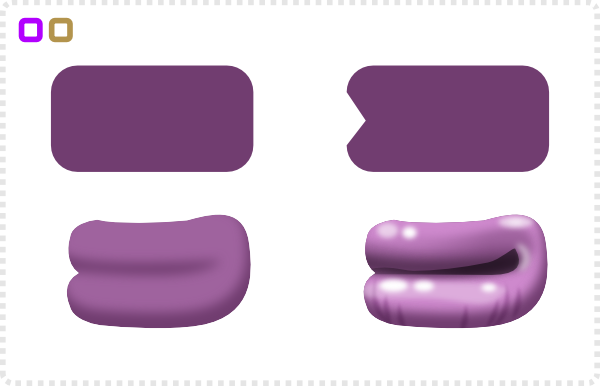
More shading and highlights on the lips give them more volume. Adding a darker line between the upper and lower lips also allows for easy display of emotions.
In the original design, the mouth and the nose were very similar. In order to make them more distinguishable, the nose gets a more recognizable design.
Finish Character Design
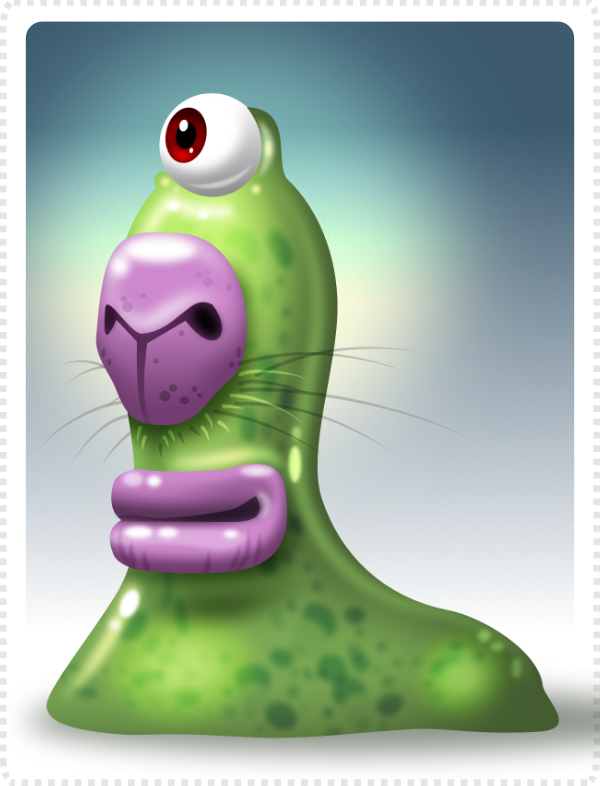
All parts put into place, with a few added details and a background [plus shadow to ground the creature].
I hope you enjoyed this quick post. It’s not the usual tutorial. Hopefully, you can take something from this review and rework for your own character designs. Play around with your character designs. Try different shading and contrast. Bring in highlights, contrast, and textures. It’s a lot of fun!


Exellent tutorial !
Lack of contrast in vector artwork is a very common problem i have encountered many times in my own work. The good thing about Affinity Designer are the Adjustment layers (like Curves), which often work as a simple fix, to boost colors where necessary, which Inkscape sadly lacks.
Vector manipulation and vector painting are almost two seperate skillsets. I find working with colors extremely difficult. Things got a little bit better after learning about color rotation in shading/highlighting.
Another amazing tutorial! Thanks!
Any hint what the equivalent of the break curve in inkscape? Thanks in advance.
Hi Learnling… It’s pretty much the same thing. Select a node/ several nodes you want to disconnect and use “Break path”. https://inkscape-manuals.readthedocs.io/en/latest/_images/node-break.svg