


Complete Game Project [part6] More Background Design
Inkscape Tutorial
In part six of the Complete Game Project we will finish the background design. After a long break [far longer than planned] I finally get to sit down and continue the tutorial for the Complete Game Project.
This time I will finish the background design, add more elements and atmosphore. Afterwards, we move to the much anticipated and a more fun part of animating our character.
Even with the cogs in place the background still looking rather empty. It’s not matching the style of the platforms with their rich decor. Let’s add something more. Ultimately, the elements in the background should match but not overwhelm the platform or enemy/ player elements.

Let’s continue with the Background

Steampunk art usually comes with a lot of pipes, steam and boilers.
In the end these layers will be give some make-over in gimp before being integrated into the game.
Create new layer ‘far back’ to separated the levels of the backgrounds.
Let’s start with a few rectangles and a circle to create the arches.
Convert the circle to a path,
break the path at the bottom node and delete the two nodes created at the base the circle .
Adjust the stroke to match the width of the column.


Convert the stroke to a path. I like to do it in order to create a scalable object without having to worry about the stroke thickness (via Path/ Stroke to Path – [CTRL + ALT + C] ).
Assemble the bits to one segment of the arches.
Once you have the base arc element it’s easy to create variations with a few added rectangles.
As this will be a background element there is no need to add more detail e.g. bolts or even shading.

Putting in some Pipes

The next layer will be made up of pipes nd boilers. What looks like a rather complex element can be easily broken down into simple parts.
All we have here are some rectangles, rectangles with rounded edges and a few circles.
Create a few rectangles, a rectangle with slightly curved corners and pill shaped rectangles with extremely curved corners.
Use varying stroke thickness for the different pipes to make the layer look more interesting. Keep the pipe elements with a stroke as those need to shaped and worked on.


Assemble the different objects to create interesting silhouettes.
As with the layer before, there is no need for shading and additional detail. The small dial probably is already too much detail.
To create more complex pipe shapes use either the straight line tool and manually bend the corners or split up an rectangle and use the corner pieces as building blocks for the pipe system.
With the snap to objects turned on the properties [Shift-CTRL-D] assembling the elements is quite easy.

Adding Background Layers

The next two layers are much of the same. In order to be more visible increase the darkness slightly and lower the height in order not to completely cover up the layer underneath.
The final background layer is the lowest in the stack and also the darkest.
Note:
You could make these wider than the screen size and end on a similar height with similar objects to make the layers seamless for paralax scrolling.
(I will keep this part for another tutorial though.)


All the layers will be placed on a simple rectangle with a gradient from darker at the top to lighter at the base.
A rectangle makes up the windows. Duplicate it to form first two windows, then duplicate those two to create a segment of four rows and finally duplicate all those for the other column.
Note:
Assembled in Inkscape the background looks very sharp and clean.
Inkscape allows for blurs and filters to change that and get a ‘smoother’ look.
I rather export each layer to a .png file and take it into gimp (or other bitmap tools) for more control over the effects.
Adjusting the Background Layers
Taking the layers into gimp and adjusting different levels of blur to them – increasing slightly the further back the layer is – results in something like this.

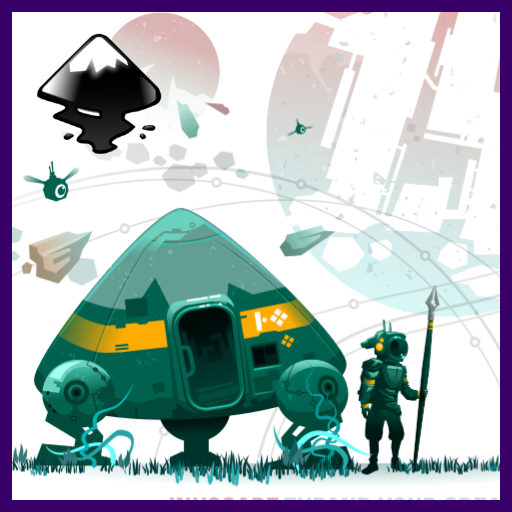
Putting the platforms on top along with the cogs and some light rays (simple rectangles deformed, blurred and the background works nicely.

Finishing the Background Design
I hope you enjoyed this installment of the Complete Game Project – Background Design. We can call the background done and it’s time for the next step. I can assure you, that part will be a lot of fun as we start animating the main character.
More posts in this series:


Excellent, as usual. Looking forward to watching the next one, the animation of the main character sounds extremely interesting.
Man, that's beautiful. But my problem as a programmer is that I can't imagine those things to make them. Such simple shapes to make such a cool design. That takes imagination, I wonder how you flex that muscle.
Thanks… and yes.. I am looking forward to making the robot run, jump, shoot and die… ;)
That's the thing… it's coming naturally… not much of a thought process or even a muscle to flex. I just start with an idea and let it flow… ending up in a rather unexpected result at times but even those might be good for something at one stage and one game. The more you play e.g. with variations on an object the easier it gets next time around to come up with a design for a similar task.
Excelente.
That's such a great tutorial, once again, it will come in real handy with building my backgrounds. :)
Chris, you never search for references first?
I do search for references a lot when I am unsure about the look and feel of objects I am creating or finding a sample for the right mood/ colour scheme for a scene.
For backgrounds like these and a lot of the elements covered in the tutorials I work from experience, gutt feeling or memory (as I have done similiar work before).
I do however recommend searching for references whenever you can, as they help you get the right look done a lot faster and more accurate.