


Creating tileable patterns for seamless ground tiles
Inkscape tutorial
It’s been a while and I still haven’t managed to make a video of it but here’s the step-by-step for the grass tile to get things started again.
The workflow is based on the video tutorial I posted earlier on Creating tileable patterns for seamless background.


Starting with a triangle via the line tool. The triangle is curved to form an elongated drop shape.
Set the colour to a green transparent gradient with full transparency at the based of the shape. The transparency helps create a layered effect and makes it leaves at the bottom look like they are in front of the higher ones.
Scale two duplicates vertically to create variations.
To make it faster to fill the tile square with a lot of grass leave, create a bunch of duplicates and group them.
The shape of the group is of no importance.


Create a square and set the size (width and height in the navigation bar at the top) to identical values (e.g. 100px).
Open the preferences [Shift+Ctrl+P]. In the Behavior section set the arrow key steps to the same value (in this case 100px).
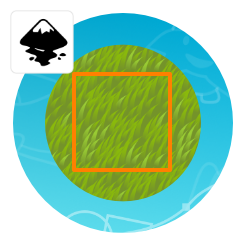
Place the group of grass leaves in the top corner of the square. In order to be seamless the same group needs to appear in the other 3 corners as well.
By duplicating the group and moving it via the cursor keys, the copy will be place perfectly on the edges of the square.


Each group of grass that goes beyond the tile square [mareked in yellow and blue] needs to have duplicate on the opposite edge of the square .
Grass that stays completely inside the square [red] does not need a corresponding duplicate.
Filling the space
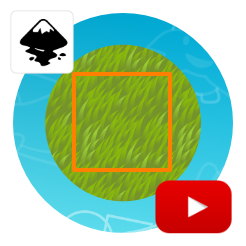
Place more groups until the square is more or less evenly filled with the grass.
Smaller gaps can be easily covered with single leaves.
The same principle of duplicates on the other side of our base square applies to the single leaves as well in order to ensure that the tile will be seamless.


Once you filled the area without big and noticeable holes – which will make the pattern look recognizably tiled, it’s time to combine it all and bring it into shape with the clip tool.
In order to do that, duplicate the square [it will bring it to the front], select all and put everything in to the clip via [Object/ Clip/ Set].
The result should look somewhat like this.

Adding variations

Duplicating this new ‘clipped’ object and moving the copied version with the arrow keys should create the seamless grass texture that we are after.

Note:
Play around with the shapes of the leaves and the group of leaves.
For this sample I arranged the leaves in a more diamond shape group and mirrored some of them for a less even look.

Note:
When exporting the tiles from inkscape to bitmap, set the size to 2x or 3x the size of your ingame assets. Scale the art assets down in tools like gimp or Krita. A good practice to avoid antialiasing on the edges is to export to e.g. 514×514 pixels and then reduce the canvas [not scale but crop] to 512×512 pixels to cut the 1 pixel around the tile. The loss should not be visible in the ingame art work with tiles of 128×128 pixels or smaller.
I hope you enjoyed the tutorial as much as I did finally getting back into writing it. :)

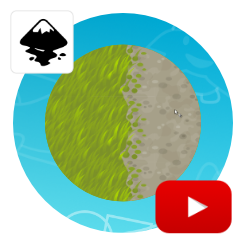
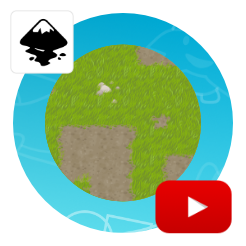
You can also add several different groups of leaves, add flowers or stones.
This sample uses two different groups.


By changing the inner elements of the tile while keeping the outer [connecting] parts intact you can create variations that will still seamlessly connect.
Here I opened up some of the groups, rearranged the leaves and added some stones.
The tile with the stones will connect perfectly with the standard grass tile as they share the same leaves on the tiles borders.


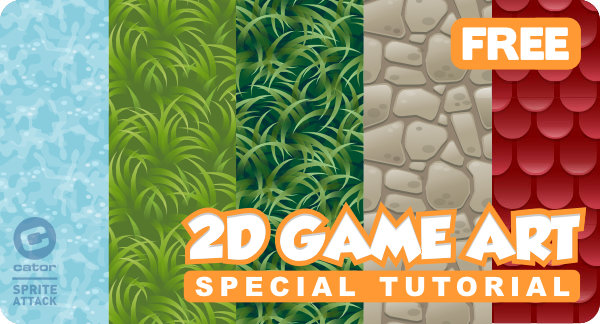
I compiled a PDF document [21 pages] with more tile styles, tips, and tricks. The document is free to download and you can open the vector images inside in Inkscape, Affinity Designer, CorelDraw, or the vector tool of your choice. Enjoy!


OMG! sunday 29… i can see the future :)
Yaaaaay ! Finally <3
Very nice and beautiful presentation !
Very useful. It's great to see you back!
Awesome as usual. Thanks
Simply brilliant and brilliantly simple.
Love it. :)
Great tutorial, thank you! Good to see you back in making tutorials! :)
We miss you Chris.
Nice work. Beautiful and easy.
Thanks.
I love to see you arround here again. a really happy day when somebody feels better. And for the tutorial, what can i say you are a master in that field, i am more Krita artist :D
Take care!
Thank you Chris! And i will wait for another tutorial for you!
Great to have you back, and with such an excellent tutorial. You have no idea how much I needed this, thank you. :)
Everything worked great and I was able to achieve a seamless texture, but for some reason there is a tiny hairline (less than one pixel) when i duplicate and move the square. Any idea what could cause this?
Is this line in the display in inkscape or in the art when you export it?
sorry, but i am really stupid at this,i can't make a first step in this tutorial. can you explain in more details, please..
Yeah it is on both. It is very strange I did some reading up it might be AA? I see a little bit of it on your examples. In inkscape it seems that the zoom makes it look better/worse. Very strange.
The only real solution I found was once its all tiled, to change step to like 0.1 pixels and shimmy the gap closed lol.
i mean,how to make the triangle elongated like the picture
I would suggest starting the with the basics. The directory on zeef might help pick the easier tutorials first:
https://2d-game-art-tutorials.zeef.com/chris.hildenbrand
I haven't encountered the problem in inkscape but it's a big problem in illustrator and coreldraw – the antialiasing is putting in 1/2 pixels that end up being transparent.
I work around it by exporting the tiles in a larger scale to start with and then take 1 pixel off on all sides in the bitmap tool [e.g. gimp] by reducing the canvas size before scaling to the desired in-game size.
thanks for the reply
You are simply awesome in making people understand complex things in simple ways!
Thanks. I try to show that most things actually are a lot simpler when you sit down and think for a moment before diving in.
I too have the slight gap when making the final step (inkscape) in the tutorial here. Might be a setting I have.
I held down the Alt key (in windows) and selected each tile one at a time then one push of the arrow key tightened it all up =)
Thanks Chris, you're a life saver! Please add more tutorials on sand tiles, water tiles, etc. Maybe you can write a PDF that we can purchase. Anyway, your way of teaching is very effective, please add more yt videos and tutorials!
There is a pdf here:
https://sellfy.com/p/wE4s/