


Complete Game Project [part5] Background Design
Inkscape Tutorial
In this part of the Complete Game Project we work on elements for the background and design some cogs. There is a lot of space to cover and with the level of detail in the character, platforms and the enemies it will need some detail to match.
Note:
Now that I am done with the step-by-step tutorial and ready to post it here, I realize that I did explain some of this briefly in the tank tutorial a while back. Blame it on my old age or just having written too many of these tutorials to remember properly – but I still hope this is helpful as it’s a bit more detailed.

Getting Started on the Background Design

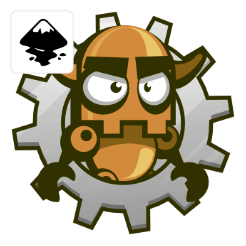
After putting the elements created so far into a mockup the lack of detail in the background becomes quite obvious.
Let’s start by creating the cogs that I used as the spark for the design of this game.
The main tool that can help with it is the “Align and Distribute”.
Let’s start with the basic setup and add more detail to variations as we go.
Create 3 circles, align them to be centred and combine them via ‘Path/ Exclusion’.
Create a rectangle. Bring the top nodes of the rectangle inwards, create a duplicate and mirror it.


Place the rectangles on the circles. Align both of them to be centred horizontally to the circle. Group them and align the group vertically to the circles.
Now we have a group centred to the circles, which allows us to rotate them with the pivot point in the centre of the circles.
This makes it a lot easier to create the other teeth.
Duplicate the rectangle group and rotate it while holding down ‘CTRL’ (this will lock the degrees).
Repeat the process two more times to get a simple 8 teeth cog.

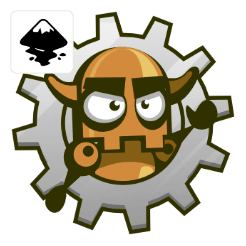
Designing Bigger Cogs for the Background

For a larger cog create a two bigger circle and reuse the teeth from the earlier design.
Note:
In the fixed tutorial layout it looks like the teeth have been scaled down. Keep the teeth the same size in order to connect properly.
Duplicate the teeth group 11 times to create a 24 teeth cog.This will work well with the rotation while holding the CTRL-key.
Note:
This is a purely visual approach. It won’t work if you plan on using cogs in a realistic puzzle game. Diameter and teeth would need to be accurate.


Duplicate the ring shape and scale it down [holding CTRL & SHIFT to keep the centre and proportion].
Add a rectangle that fits into the frame, duplicate it twice and using the ‘Align and Distribute’ ‘make the horizontal gaps of the object equal’.
Add another rectangle to fill the inner ring, duplicate and rotate 90˚.
A few more circle finish of the elements for this larger cog.
Use the ‘Path/ Union’ (all shapes but the small circles and inner circle] and ‘Path/ Exclusion’ [for those circles] to combine the elements.

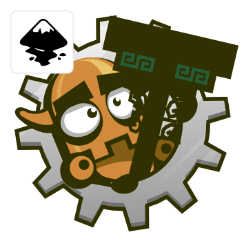
One more Background Element

For different sizes the snapped angle rotation might not work that well either leaving too big or small gaps between the teeth.
In order to get the right spacing open the Transform panel (CTRL+SHIFT+M).
Open the ‘Rotation’ tab and enter the degree (e.g. 20˚).
Fill the 360˚ by alternating between duplicating and pressing ‘Apply’.


There is no limit to variations – and if you need inspiration there is always a search on google images on e.g. ‘clockwork’ or ‘gear’.
Note:
When exporting the cogs make sure you either create an invisible square bounding box or resize the canvas in your bitmap program to make sure the pivot point is in the centre of the wheel.
It’s even more obvious in uneven numbers of teeth.

Next up will be a part on creating pipes, connections and some nice silhouettes for the background.
More posts in this series:


It's very nice, these cogs add style to the picture. The lack of texture is the hard part in vector graphics, it forces forces us to be creative.
I build a webgame with a map (like Risk board game) in a vegetal universe (units are ants, beetles, praying mantis…). I have difficulties to create top down graphics for this, as a sole developer I need to do some graphics myself to build the prototype. If you have any advice drawing vegetal decoration, I am all ears. ;)
Thank you for this tutorial in particular – cogs are one of those things I've always had trouble creating (a sticking point when you're trying to do something steampunkish!) and this really shows how to do it easy.
Hey, Chris. I have a couple of doubts. Which device you personally use for your artworks: mouse or tablet? And which device you recommend for a newbie like me to draw 2d art? And by the way, this is a great tutorial as usual! :)
I did something like that a while back in a cute style for a kids game though… Let me see if I can find the art and break it down into a tutorial.
I have been working with wacom tablets for the last 15 years or more… the mouse [unless I have a touch pad on a laptop] is just for the right click as I find that one a bit hard to use on the pens.
I find them a great tool – BUT it takes time to get used to. I came from a drawing and painting background and even though I did a lot of art in the early days on my Amiga with the mouse, the pen just feels more natural to me. These days I draw, pixel, vector bend and poly turn with the pen rather than a mouse.
I would always encourage people to give it a try. Start with a low-cost wacom [there is another pretty good and cheap brand out there – I just can't think of the name right now – but I would go with a quality product]. The small bamboos do a great job. Give it a try – as I mentioned before – it will take time, but it's worth it.
Thanks a lot for this great tutorial! Very well done!
Go to extensions..Render …gear…in inkscape as an alternative and modify to your like ing as an alternative effect if you prefer .
This comment has been removed by the author.
Been busy, working on this using the orx game engine.
here is my first build for Android, nothing much to see (yet), mainly to test the gameplay.
https://dl.dropboxusercontent.com/u/6356668/BotBox-v1.apk (working)
Great, as allways :). Don't worry about going in too much detail, it's newer too much :).
Hey Chris, awesome as always.
What do you use for animating?
Get you working hack tools and be a hacker game hack tool my blog .thanks a lot
simple et efficace comme toujours, mes encouragements pour la suite :D
For this project I will do the animations in inkscape. For other works I use Coreldraw or Flash depending on the style.
Looking forward with baited breath for part 2!
This is a really cool multi-part series! Can't wait to see the rest of it. Maybe add a tutorial on creating a custom font also? Thanks for the blog.
This project is on hold?
Hey Chris,
In this ludum dare I for the first time used inkscape art that I made on the spot.
It is mostly based on your tutorials, I thought you might want to have a look at the silly monkey throwing "stuff" game :)
https://jppresents.net/static/ld32/
I even got some praise for the graphics in the comments – this is definitely thanks to your tutorials!
Keep up the great work!
Hi Sauro. I apologize for the delay I was caught up with family and health issues and hope to get back into the tutorials this week.
Nice start JP. I would like to add some feedback – is there a way to email you in order to not flood the blog with it. Send me a line through my gmail email – recently added on the top right of the blog.
Oh Sorry to hear that! Hope everything is well now!
Hello Chris.
Thank you for your amazing tutorials! I'm a programmer without designer skills and hope once I can create a cool game. I'm working now with this course, it helps me to learn basics of game design which I really need. I'm going to use the resulted design of the course to create a simple test game for learning game development :)
Good luck! Keep up this great work!